Guest Post : Jamie of Paint The Gown Red

Hey everyone - I have something a little different going on today. Jamie, of Paint The Gown Red, and I have swapped blogs for the day! Jamie is super adorable (I mean, look at that cat hat!), so please welcome her to HollyDolly. And donā€™t forget to head on over to Paint The Gown Red to check out my outfit!

#1

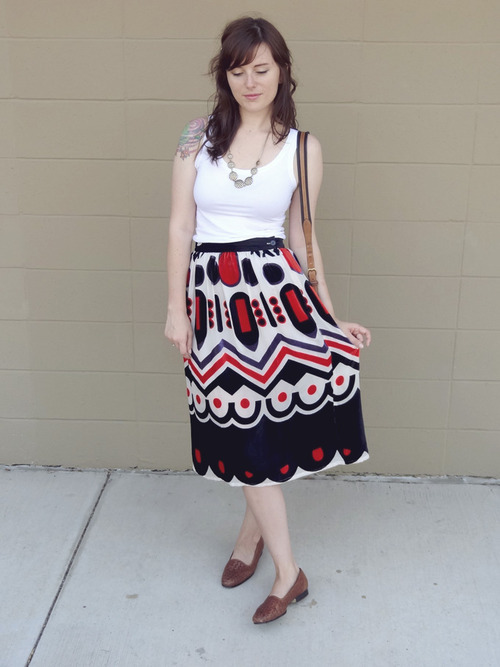
Why, hello wonderful Holly Dolly readers! Iā€™m Jamie of Paint The Gown Red, and I am super excited to be here today to share with you my handmade style. Iā€™m often inspired by Holly and her incredible handmade pieces, and thought for this guest post Iā€™d challenge myself to put a little dolly in my dress. However having just learned to sew this year, my sewing skills are a tad limited. But everyoneā€™s got to start somewhere. Can you guess which piece is a Jamie original? 

If you guessed the cat hat, youā€™re not completely off base. This adorable cloche was handmade, but not by me. Itā€™s actually by Jessicozy for Dear Creatures. I first spotted the cap in the Dear Creatures Fall lookbook and contacted them immediately to see when and where I could get one. It wasnā€™t for sale. I must not have been the only one crying, ā€œwoe is meā€ for a few months later they started selling the lovely cat hats. 

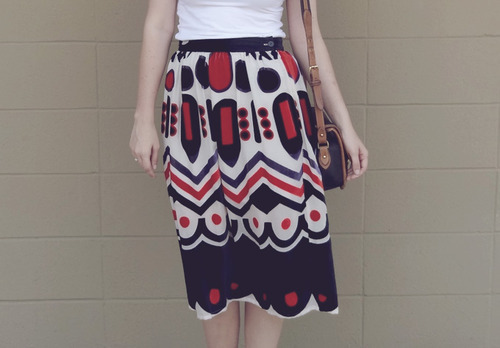
The one of a kind item that is in fact handmade by yours truly, is the apple skirt. It was one of the first pieces I ever made, and Iā€™m pretty pleased with the result. Thereā€™s something very special about handmade clothing; itā€™s never perfect, each piece is unique, and you can always see the time and labor invested in its production. To me, that makes handmade all the more valuable. 

Thank you Holly for letting me be a part of your lovely blog. I hope you all enjoyed my handmade style and please stop by Paint The Gown Red and say hello!  

#2

#3

#4

#5Blouse: Free People 

Skirt: Handmade

Petticoat: Legs Avenue 

Shoes: Barneys COOP

Hat: Jessicozy for Dear Creatures 
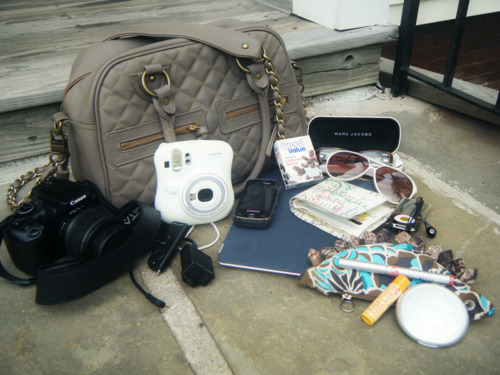
Purse: Vintage 

My Workspace (and a guest post)

sew2

IMG_0604

sew6

Hello friends! Today Iā€™m over at Hollyā€™s (name twinsies!) blog, Scuttle, talking about my favorite parts of my workspace. To  see more pictures and to read what I have to say, head on over here and check it out!

P.S - thank you to all who have been voting for me in Modclothā€™s Make The Contest. If you havenā€™t voted yet, please, hop on over here and do so! If you have voted already, vote again! You can do so every 24 hours :)

Guest Post: Jennifer of If I Must Say So

Hey Everyone! While Iā€™m away getting hitched and enjoying our honeymoon, Iā€™ve asked a few friends to step in for me and keep HollyDolly alive and running.

Today we have Jennifer from If I Must Say So. She is here to share with you an outfit that reminds her of her own honeymoon - in Australia!  

Hi, Holly Dolly readers! Jennifer of If I Must Say So here. Iā€™m delighted to be back sharing a honeymoon-inspired outfit post while Holly and her beau are off celebrating their brand new marriage in St. Lucia!


My husband and I married here in Austin, Texas, back in October and we went all the way to Australia and New Zealand for our honeymoon. It was such a long trip, but we loved every ounce of it. And the shopping in Sydney wasnā€™t so bad either!


Sydney was our last stop before heading back to the U.S. and I knew I wanted to bring home a memento from our stay there. And thatā€™s where I fell in love with the Melbourne-based brand Gorman. And this skirt! Iā€™m crazy about the length, the colors, the sheer fabric, and the plush velvet pattern. Every time I wear it I think of bustling Sydney and our crazy little Australian adventure.


tank top: Gap

skirt: Gorman

shoes: Thrifted

bag: Thrifted

necklace: Madewell

hair pin: ban.do  

 .

Thanks for having me, Holly! I canā€™t wait to read about your trip!

Guest Post: Megan of Feathers and Freckles

Hey Everyone! While Iā€™m away getting hitched and enjoying our honeymoon, Iā€™ve asked a few friends to step in for me and keep HollyDolly alive and running.

Today we have Megan from Feathers and Freckles (who just recently got married, herself! Congrats Megan!), and Iā€™ve asked her to share a vacation outfit with you all. So make her feel welcome!

Hi there! Iā€™m Megan from Feathers & Freckles and Iā€™m so happy to be posting for Holly while sheā€™s off enjoying her wedding and honeymoon.

I absolutely love traveling but hate packing. I always end up with 9 pairs of heels that I donā€™t even wear but forget my toothbrush or underwear.

For summer trips that include lots of beach time, I like to pack lightly (as a pale redhead, ā€˜beach timeā€™ means hiding under an umbrella and somehow still getting sunburned). I try to wear items that are easy, colorful and can take me anywhere from the sand, to a restaurant, to browsing the souvenir shopsā€¦ because Iā€™m one of those annoying people that must buy magnets and postcards for everyone Iā€™ve ever met.

Untitled

Untitled

Untitled

Untitled
bird8Target romper, hat, and sandals, Fossil bag (similar), Handmade necklace & hairpin

Guest Post: Linda of Little Tin Soldier

Hey Everyone! While Iā€™m away getting hitched and enjoying our honeymoon, Iā€™ve asked a few friends to step in for me and keep HollyDolly alive and running.

Today we have Linda from Little Tin Soldier. Linda is the sweetest. And she has even had a part in my wedding planning (come back tomorrow for that)! But today, Iā€™ve extended a virtual invitation, and asked her to come up with her best wedding guest outfit.

Hello, Holly Dolly readers! Iā€™m Linda from Little Tin Soldier, and Iā€™m absolutely tickled to be a virtual attendee at Hollyā€™s wedding. Over the past couple of years, Holly has become my go-to crafting friend. Sheā€™s creative, sweet, and darling. I know sheā€™s going to be a beautiful bride (a little bird might have shown me pictures).

Summer weddings are my favorite; they always include bright sunshine, pretty flowers, and cool treats. For weddings, keep your attire ladylike to ensure attention is focused on the most important ladyā€” the bride! A polished sundress or a simple blouse and skirt combination in pastel colors work the best for me. I added a fun, handmade necklace because Holly loves arts and crafts, and the clutch easily holds a phone or digital camera for pictures.

Now, if we lived in England, I would top off the entire ensemble with an incredible fascinator, perhaps one with a little prancing pug and flowers. But instead of a crazy hat, Iā€™ll bring along a sweet little card.

Congratulations to Holly and Zach!
.
Outfit details:
Top: Soft Joie
Skirt: Thrifted (silk)
Clutch: AndƩ (vintage)
Wedges: Nine West
.
Linda P.
I style, draw, doodle, and storytell at little tin soldier
Find me on Twitter @littletinlinda
Visit my little design co. THOUGH VERY HUMBLE

Guest Post: Meanz of Koi Story

Hey Everyone! While Iā€™m away getting hitched and enjoying our honeymoon, Iā€™ve asked a few friends to step in for me and keep HollyDolly alive and running.

Today we have Meanz from Koi StoryIā€™ve asked her to share an outfit that she would wear if attending my wedding. 

what i wore:
mint green vintage dress from Hill Vintage (similar)
light tan heels from Target (similar)
leaf ring from Icing
dconstruct resin bracelets from DMAC gift shop (similar)
.
Hello Holly Dolly readers, Meanz here from Koi Story! I am so excited that Holly asked me to guest post for her while sheā€™s off getting married! Sheā€™s actually getting married tomorrow! Isnā€™t that excited, I am so happy for her.
So, Holly asked me to pick out what I would wear if I were going to her wedding, and what is better than a mint green vintage dress!? I think that mint green is such a perfect summer color because itā€™s so cool and refreshing. I also paired it with minimal accessories so the dress gets all the attention! 
Tell me about your perfect wedding attending outfit!

Guest Post : DIY Felt Balls

Hello, HollyDolly readers! Jennifer here of If I Must Say So, a life and style blog where I write about my daily food, fashion, and crafty inspirations. Iā€™m here to share
one of my latest projects in which I made little felt balls for a garland. I originally
followed this fabulous DIY from Design Sponge, but modified it a bit based on what
works for me!
.
After making dozens of little felt balls in a variety of colors, I decorated them with
thread and strung them to make a cute, colorful garland, which I can use to decorate
my Christmas tree next year or just to add a pop of color in my apartment.
Things youā€™ll need:
Wool roving (available at any craft store)
Soap (dish or hand soap is fine)
One bowl of super hot water
One bowl of freezing cold water
Thread in a variety of colors (if you choose to decorate your finished felt balls)
Thicker string or thread for the garland
Needle
.
Another note before we beginā€¦
It took me about 3-5 minutes to make each felt ball, and I noticed that my hands would
feel pretty dry and prune-like after making three or four of them. Take your time and
plenty of rest throughout the process. I found that the balls turned out better when I
made a few at a time over several days rather than a whole bunch at once.
.
1. Tear off a 5-6 inch section of the wool roving. Donā€™t worry about making a perfect
tear because the ends should be ragged.
2. Put a small drop of soap in your hand and rub a little into the wool roving.
.
3. Form your piece of wool into a loose ball and dip it in the bowl of hot water. Do
not dunk the entire ball into the water. You want to get it just wet enough so that
you can sort of gently work the soap and water into the rest of the ball with your
hands.
4. Gently start rolling the wool roving into the shape of a ball. At this point, the ball is
pretty flimsy, much like a cotton ball. Just continue rolling the wool until you have a
decent ball shape and then dunk the entire ball into the cold water.
.
5. Keep rolling the ball and then dunk it in the bowl of hot water. Continue rolling
the ball and then dunk it again in the cold water. Keep alternating between rolling
and dunking between the two bowls of water.
6. Every two or three dunks, rinse off your hands and the ball under cool running
water and then continue rolling. The ball will start to feel firm and become smaller.
7. At this point you may start to notice a few dents or cracks in the ball. To hide
the cracks, take a smaller piece of wool roving with a little soap on it and place
it directly over the cracked area. Continue rolling and dunking the ball in water.
Eventually the smaller piece of wool roving will work into the ball.
8. Once you have a firm, crack-free felt ball, leave it out to dry for 1-2 days. A
finished felt ball should feel completely dry and have a little bounce to it when you
throw it on a hard surface.
.
9. Take your finished felt balls and string them to make your garland! I ended up
using my finished garland to decorate a bare wall in my office space.
I canā€™t wait to see how your felt balls turn out! Just take your time and remember
that your felt balls will look better and better with more practice!
.
ā€¦ā€¦ā€¦ā€¦ā€¦ā€¦ā€¦ā€¦ā€¦ā€¦ā€¦ā€¦ā€¦ā€¦ā€¦ā€¦ā€¦ā€¦ā€¦ā€¦ā€¦ā€¦ā€¦ā€¦ā€¦ā€¦ā€¦ā€¦ā€¦ā€¦
Thank you so much Jennifer!! Iā€™ve always wanted some of these for garland, and now I canā€™t wait to give this tutorial a shot myself!
.
Donā€™t forget to head on over and check out Jennifers blog - If I Must Say So .