It's A Crafting Party!

Linda and I cordially invite you to a clutch party! Put on your DIY hat and get out all your crafting gear, because we want to see you get creative. Whether you want to sew up a new one from scratch, or embellish an old or thrifted clutch - the choice is yours! Just have fun :)

If you choose to go from scratch, heres a few good tutorials I’ve come across to get you started:

Style Scrapbook - zipper clutch

SwellMayde - envelope clutch

Fab Handmade - foldover zip clutch

Just email Linda or myself (HLKeenan22@gmail.com) by April 27th with either the photos of your clutch, or a link to your blog post showing off your new accessory! Linda and I will round up everyones photos and share them shortly after. 

Happy crafting!

P.S - the lovely invite was drawn up by Linda, herself. Isn’t she very talented :)

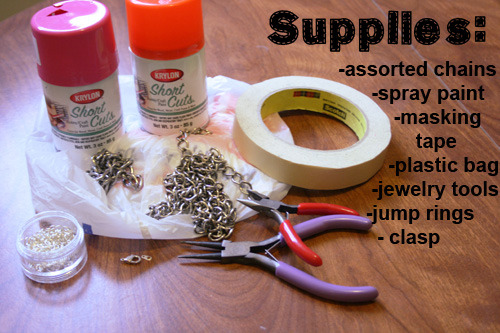
Neon Chain Necklace DIY

Its DIY wednesday! Here we goooooo…….

Heres what to do:

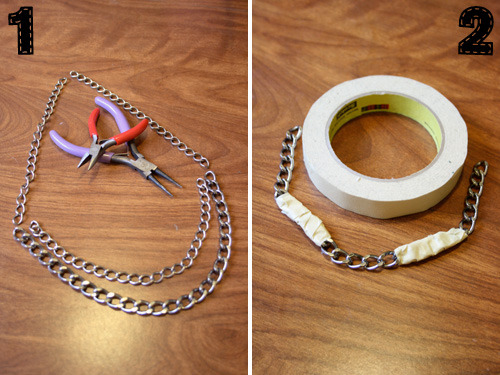
1. Plan out the layout and look you want for your necklace and cut the chains. 

2. Using the masking tape, block off where you want to paint the first color. Make sure the tape is nice and tight around the ends so no paint sneaks in there!

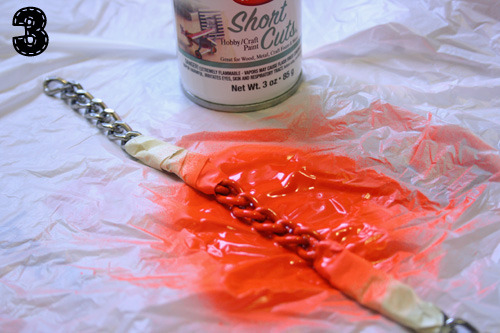
3. Follow the directions on your spray paint can and coat your first section. Make sure you get all sides, letting it dry in between. It may take a few coats.

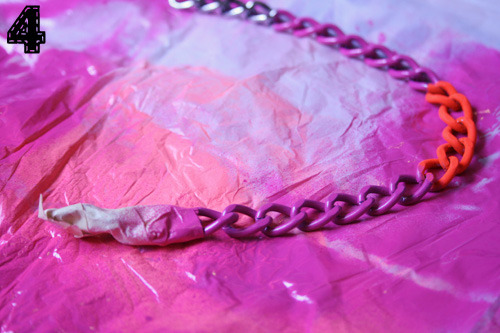
4. When your first section is completely dry, remove the tape. Repeat the taping process to block off your next sections. Be careful though. I found that taping my already painted orange section peeled the paint off. So instead I carefully wrapped that section nice and tight with a paper towel, and then covered the other ends with the masking tape.

Spray paint your second color. Doing exactly what you did for the first color. 

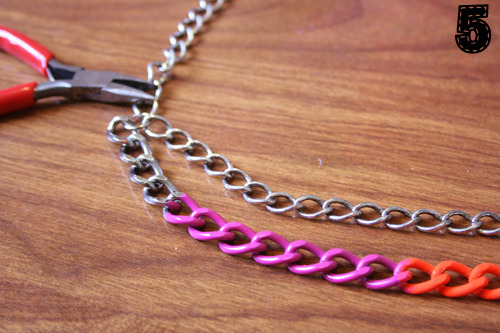
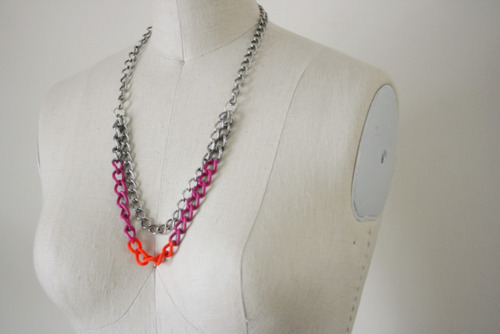
5. When your second color is completely dry, remove the tape and assemble your necklace!

Tadaaaaaa! I can’t wait to wear this baby :)

DIY Headbands

Today I have a super easy and quick way to make a headband. Its great for anything you may have lying around - extra trim, ribbon, an old sash belt, fabric scraps, or anything you can think of! All you need to do, is add one of the kajillion hair bands you have lying around (come on, you know you do), and voila! A instant stretchy headband!

what you’ll need:

-your trim/ribbon/fabric/etc.

-hair bands

-tape measure

-sewing machine or needle and thread

1. Measure around your head and subtract 1”. Measure and cut this length from your ribbon/trim. If you want to do a bow, I suggest you tie the bow first, and then measure from there. That way you don’t end up with too little/ too much for the bow. 

2. Wrap each end around the hair tie and pin. Don’t leave too much seam allowance! If you do, you’ll be making it smaller than planned and the headband will be tight.

3. Sew! You can do it by hand or by machine. If you are doing it by machine, I suggest you use a zipper foot or something similar. It will be easier to get right up next to the hair tie. When you’re done, trim any excess.

And there you have it! A super simple way to turn anything into a stretchy headband!

DIY Heart Elbow Patches

IMG_7429

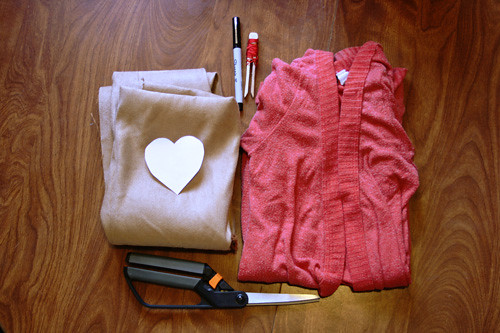
what you’ll need:

- cardigan

- suede, leather, or whatever fabric you want to use

-marker

-embroidery thread

-heart pattern

IMG_7436

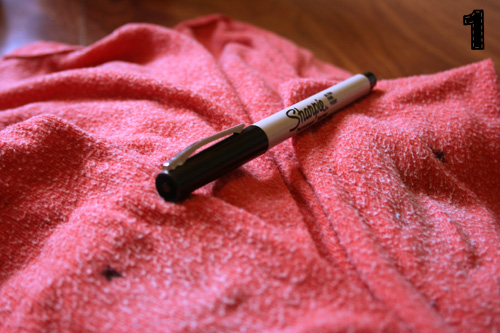
1. Put your cardigan on and bend your elbow. With the marker, mark the middle of your elbows where you want the patches to go. Just mark a small dot or x.

IMG_7440

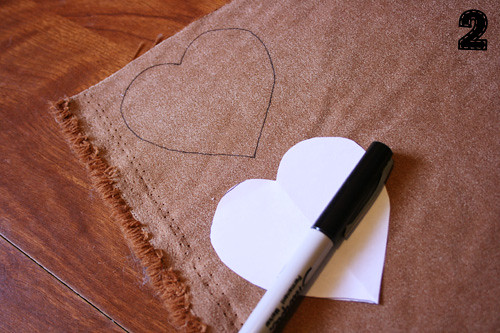
2. Using your heart pattern, trace your heart onto to wrong side of your suede and cut them out.

IMG_7447

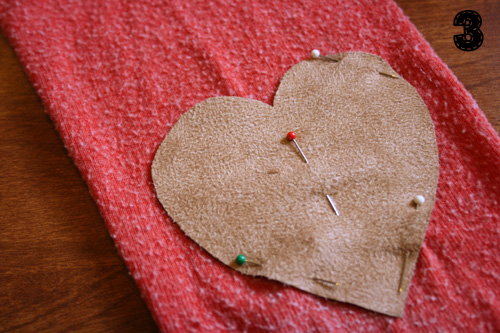
3. Pin the heart patches over your elbow marks.

IMG_7450

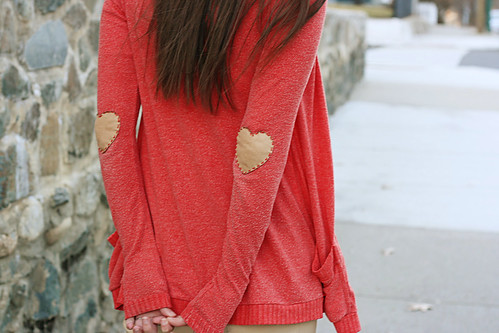
3. Using your embroidery thread, stitch your hearts in place! I chose to stick with a basic running stitch, but you could do whatever fancy stitch you may like.

IMG_7708 copy

Tadaaaaaaaaa. You can see a little more in my outfit post tomorrow!

DIY Ring Charm Bracelet

IMG_6229

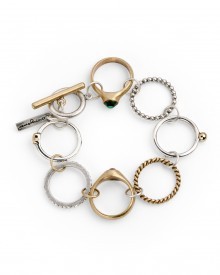
Did you guys happen to see that one bracelet on Jewelmint? You know, this one:

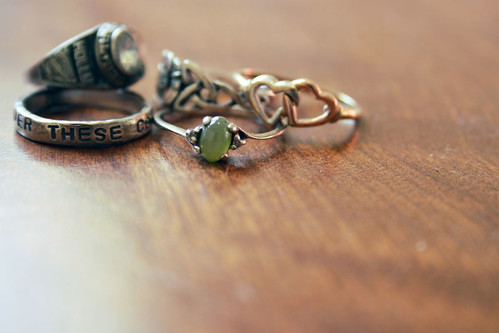
When I saw it, I immediately thought it was very cool idea. And I also thought it would be a perfect DIY. I have so many dainty little rings in my jewelry box, that while they still mean a lot to me, I don’t really wear anymore. So I thought it would be perfect to recycle them into a brand new piece of jewelry!

IMG_6222

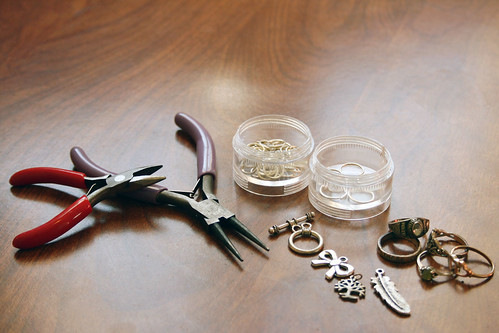
what you need:

- assorted old rings

-extra charms

-assorted size jump rings

-toggle clasp

-jewelry pliers

IMG_6237

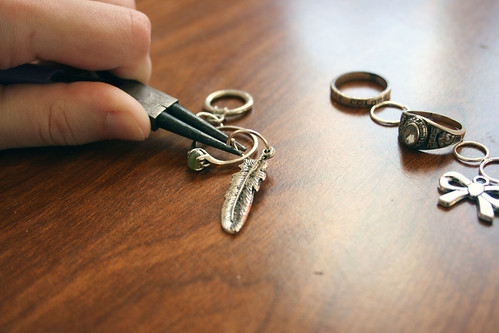
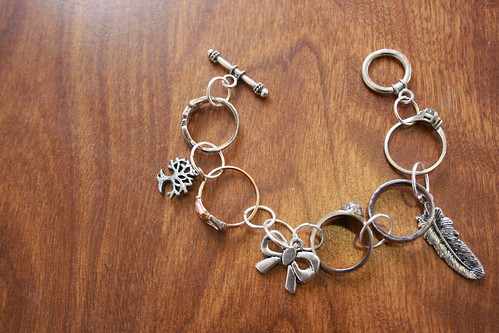
A step by step guide really isn’t needed for this one. Simply attach the rings and charms together with the jump rings until you have the look and length you are going for. Be as uniform or random as you want. Another good idea is to mix metals. If I would’ve had other jump rings than silver, I definitely would have used them.

IMG_6244 IMG_6497

THREE Faux Fur DIYs

I’m on a roll with my one project a week goal. So much so that I did three this week instead of one! I was inspired by one of my favorite DIY  and lifestyle blogs - Cotton and Curls , who just recently did a faux fur week with 6 different projects!

Untitled-2 copy

My first two projects were taken straight from Liz. If you are interested in the instructions, make sure to check out her pom pom  and boxy vest tutorials. As well as the rest of her faux fur projects

Untitled-1

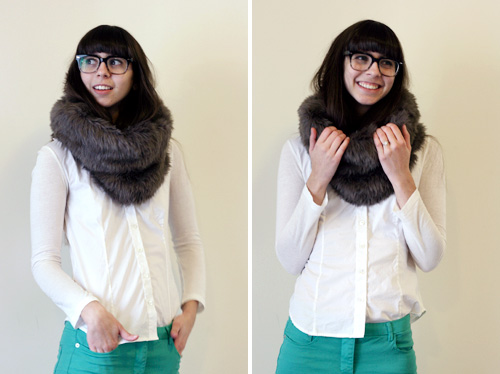
And then I went off on my own for my third item - a faux fur snood!

Heres what you would need:

-faux fur

-measuring tape

-sewing machine

-needle and thread

1

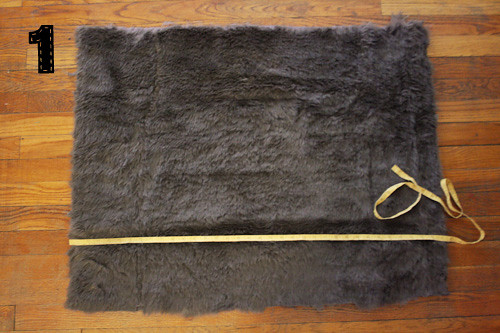
1. Cut out a piece of fur aprox. 36 x 28”

2

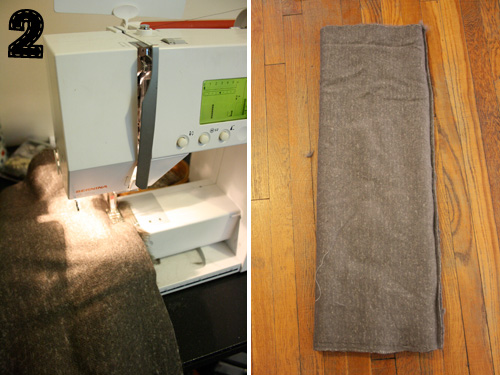
2. With right sides together (fur sides together), fold the fur in half the long way, creating a tube. Sew along the edge. 

3

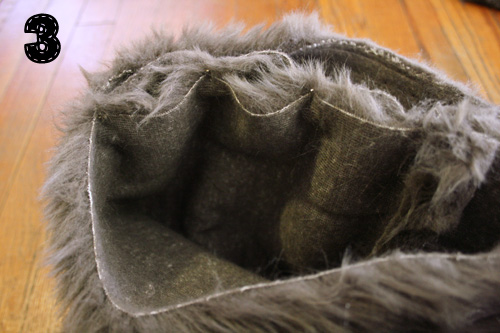
3. Next, turn the tube right side out again, so the fur is on the outside. Being the ends on the tube together, and pin and sew as far around as you can. For me it was a little more than half way. 

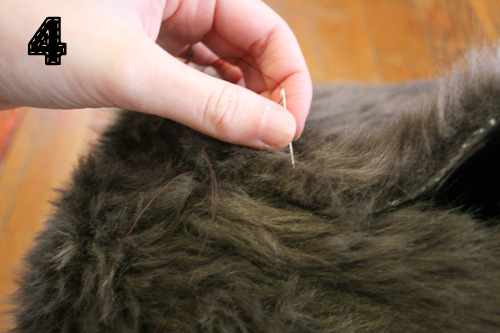
4

4. finish closing the ends by hand stitching. Don’t worry if your hand sewing isn’t the greatest - the best part about working with the faux fur is that it hides all of the stitching!

finished

And voila, a new cozy snood :)

………………………………………….

Don’t worry, you will see a lot more of these three items in upcoming outfit posts!

Reconstructed Tee DIY

One of my goals for the blog this year is to do a lot more DIYs than I was doing before. My hope is that if I tell myself that every wednesday must be either a DIY or wedding post, it will keep me busy, motivated, and constantly working on new projects. Heres to hoping :)

So I’m starting out slowly with a little t-shirt reconstruction. I picked this up at the last swap I attended. Its a mens XL, and way to big for wither me or Boo. But I’m a sucker for ombre, and its the softest cotton ever, so as soon as I touched it there was no way I was putting it down. 

And now I finally got around to sizing it into a shirt I can actually wear :) Heres an easy way to turn an oversized tee into something more fitted. 

before

You’ll Need:

-an oversized tee

-a tee that fits you well

-something for marking (tailors chalk, colored pencil, etc)

-sewing supplies

-rhinestones or other embellishments

1-2 copy

1. Carefully cut off the sleeves and set aside.

2. Lay your β€œgood” tee on top, making sure to line up the neck and shoulders. trace the outline of the top shirt with your marking tool. Don’t forget to reshape your armholes too!

3-4 copy

3. Make sure you add a little seam allowance to your new lines, and then go ahead and cut. 

4. Sew up your new side seams. And then sew your sleeves back in. You may either need to make a slight adjustment to the size of the sleeve or ruche it to give it a little puff effect. (sorry, I forgot to document this separately). 

5 copy

5. And now the fun part! Use your rhinestones and fabric glue (or whatever other embellishments) to bling out whatever area you want. The pocket, collar, sleeves… whatever! I really wanted to do the entire pocket, but I didn’t have nearly enough rhinestones. 

IMG_4687

And now I have a cute and soft new tee shirt! Now that I’m looking at the photos, the only other thing I might go back and do is shorten the sleeves a little. But I like how it came out, otherwise. 

IMG_4635 IMG_4640

**Keep a lookout from now on every wednesday for either a new project or wedding related post. I’m pretty excited for this!**

Guest Post : DIY Felt Balls

Hello, HollyDolly readers! Jennifer here of If I Must Say So, a life and style blog where I write about my daily food, fashion, and crafty inspirations. I’m here to share
one of my latest projects in which I made little felt balls for a garland. I originally
followed this fabulous DIY from Design Sponge, but modified it a bit based on what
works for me!
.
After making dozens of little felt balls in a variety of colors, I decorated them with
thread and strung them to make a cute, colorful garland, which I can use to decorate
my Christmas tree next year or just to add a pop of color in my apartment.
Things you’ll need:
Wool roving (available at any craft store)
Soap (dish or hand soap is fine)
One bowl of super hot water
One bowl of freezing cold water
Thread in a variety of colors (if you choose to decorate your finished felt balls)
Thicker string or thread for the garland
Needle
.
Another note before we begin…
It took me about 3-5 minutes to make each felt ball, and I noticed that my hands would
feel pretty dry and prune-like after making three or four of them. Take your time and
plenty of rest throughout the process. I found that the balls turned out better when I
made a few at a time over several days rather than a whole bunch at once.
.
1. Tear off a 5-6 inch section of the wool roving. Don’t worry about making a perfect
tear because the ends should be ragged.
2. Put a small drop of soap in your hand and rub a little into the wool roving.
.
3. Form your piece of wool into a loose ball and dip it in the bowl of hot water. Do
not dunk the entire ball into the water. You want to get it just wet enough so that
you can sort of gently work the soap and water into the rest of the ball with your
hands.
4. Gently start rolling the wool roving into the shape of a ball. At this point, the ball is
pretty flimsy, much like a cotton ball. Just continue rolling the wool until you have a
decent ball shape and then dunk the entire ball into the cold water.
.
5. Keep rolling the ball and then dunk it in the bowl of hot water. Continue rolling
the ball and then dunk it again in the cold water. Keep alternating between rolling
and dunking between the two bowls of water.
6. Every two or three dunks, rinse off your hands and the ball under cool running
water and then continue rolling. The ball will start to feel firm and become smaller.
7. At this point you may start to notice a few dents or cracks in the ball. To hide
the cracks, take a smaller piece of wool roving with a little soap on it and place
it directly over the cracked area. Continue rolling and dunking the ball in water.
Eventually the smaller piece of wool roving will work into the ball.
8. Once you have a firm, crack-free felt ball, leave it out to dry for 1-2 days. A
finished felt ball should feel completely dry and have a little bounce to it when you
throw it on a hard surface.
.
9. Take your finished felt balls and string them to make your garland! I ended up
using my finished garland to decorate a bare wall in my office space.
I can’t wait to see how your felt balls turn out! Just take your time and remember
that your felt balls will look better and better with more practice!
.
………………………………………………………………………………
Thank you so much Jennifer!! I’ve always wanted some of these for garland, and now I can’t wait to give this tutorial a shot myself!
.
Don’t forget to head on over and check out Jennifers blog - If I Must Say So .

DIY: Holiday Spirit

IMG_0451

*supplies*:

holiday fabrics

trims and notions

commerical patterns or pencil and pattern paper

needle, thread, scissors, etc

IMG_0931 three2

There were two holiday decorations that I knew I wanted to make this year: a tree skirt and our stockings. And with some 50% off fabric from Joanns, I did just that! I wish I could provide you guys with more of a detailed DIY. But to be honest, I kind of winged them both. I free handed some patterns without really measuring (which I wouldn’t really recommend, I just got lucky), and just worked by trial and error.

I’m super happy with the way they turned out. Especially the tree skirt - how cute is it with the little pom trim?! 

**UPDATE** I may have been lazy, but Megan Nielsen just posted a super detailed (and SUPER adorable) stocking tutorial. See it here

Picture 3 IMG_0973

Have you done any fun holiday DIYs? Please share!

Wedding Wednesday - Save The Date DIY

Hopefully, everyone that I mailed one too has received theirs by now. So I can show you how I made my Save The Dates!

I know - I’m actually a bit early with these. But I’ve been planning them out since august, and I couldn’t wait any longer to get them done.

IMG_7232 IMG_7238

*what I used* :

-photo strips

-laminator

-magnets

-glue gun

-tissue paper

-bakers twine

-tags

IMG_7808

After laminating all of the photos, I cut them into strips and glued a magnet onto the back. After a little wrapping  with some kraft tissue paper and bakers twine, they were ready to be slipped into their envelopes and mailed out. 

And ta-da! I really love the way they turned out. Exactly what I wanted. They’re super cute, no?

IMG_7811 IMG_7810