It Doesn't Take Much To Make Me Happy

IMG_8315

Back in the fall, the shoulder strap on my THEIT Bossi bag snapped. It was a sad, sad day my friends. Do you know how hard it is to constantly carry a heavy camera bag around on your arm? The answer is: pretty hard. That thing gets ridiculously heavy with all my crap in it. 

But the people over at THEIT were kind enough to send me a replacement strap. And when it arrived in the mail the other day, it literally made my week. Lame, I know, that just a bag strap could make me that happy. But I don’t think you understand just how heavy my bag is :)

IMG_8254 IMG_8365 IMG_8249

dress: Red Valentino; Buffalo Exchange

cardigan and leggings: H&M

bag: THEIT

booties: Target

DIY Headbands

Today I have a super easy and quick way to make a headband. Its great for anything you may have lying around - extra trim, ribbon, an old sash belt, fabric scraps, or anything you can think of! All you need to do, is add one of the kajillion hair bands you have lying around (come on, you know you do), and voila! A instant stretchy headband!

what you’ll need:

-your trim/ribbon/fabric/etc.

-hair bands

-tape measure

-sewing machine or needle and thread

1. Measure around your head and subtract 1”. Measure and cut this length from your ribbon/trim. If you want to do a bow, I suggest you tie the bow first, and then measure from there. That way you don’t end up with too little/ too much for the bow. 

2. Wrap each end around the hair tie and pin. Don’t leave too much seam allowance! If you do, you’ll be making it smaller than planned and the headband will be tight.

3. Sew! You can do it by hand or by machine. If you are doing it by machine, I suggest you use a zipper foot or something similar. It will be easier to get right up next to the hair tie. When you’re done, trim any excess.

And there you have it! A super simple way to turn anything into a stretchy headband!

EBEW : Pink and Red

IMG_7953 copy copy

Happy Valentine’s Day, everyone!

Anyone have anything special planned tonight? Boo and I actually celebrated on Sunday, because it was also the day we got engaged, one year ago. And by celebrate, I mean I made Boo go see The Vow with me. Isn’t that what Valentine’s Day is all about - watching mush, girly movies? In my head it is :)

P.S - check out how everyone else is wearing there pink and red today for EBEW!

IMG_7985 copy copy IMG_8063 IMG_8168 copy IMG_8050

sweater: Anthropologie

shirt: Zara; Buffalo Exchange

shorts: Delias

tights and flower: H&M

pin: Jewelmint, use code bos990 for 50% off your first month, c/o the Boston MBA Team

shoes: Moschino Cheap and Chic

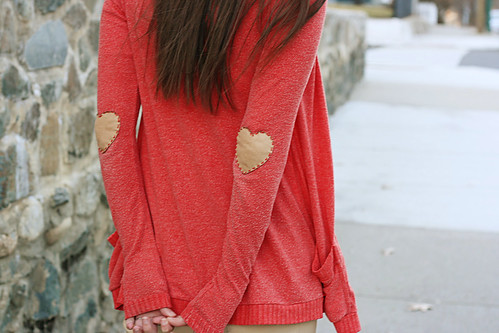
DIY Heart Elbow Patches

IMG_7429

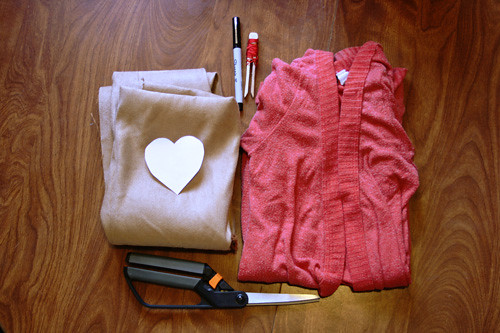
what you’ll need:

- cardigan

- suede, leather, or whatever fabric you want to use

-marker

-embroidery thread

-heart pattern

IMG_7436

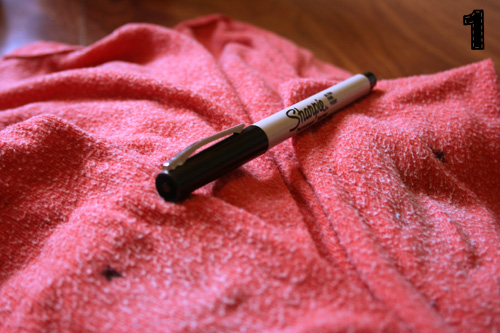
1. Put your cardigan on and bend your elbow. With the marker, mark the middle of your elbows where you want the patches to go. Just mark a small dot or x.

IMG_7440

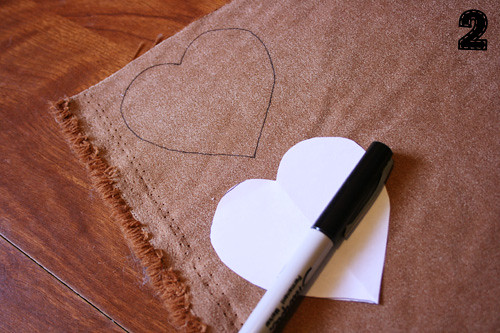
2. Using your heart pattern, trace your heart onto to wrong side of your suede and cut them out.

IMG_7447

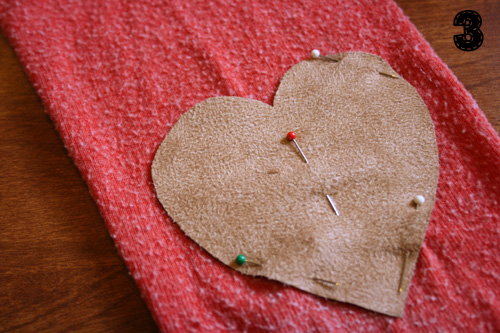
3. Pin the heart patches over your elbow marks.

IMG_7450

3. Using your embroidery thread, stitch your hearts in place! I chose to stick with a basic running stitch, but you could do whatever fancy stitch you may like.

IMG_7708 copy

Tadaaaaaaaaa. You can see a little more in my outfit post tomorrow!

Always Girly

IMG_7324 copy copy

Some days I gravitate towards black jeans, leather boots, and bold silver jewelry, and then other days I feel like dressing as girly as possible. What can I say, I guess I’ll never grow out of my bows, ruffles, and florals. 

P.S - Do you like my pin? Its my newest piece from Jewelmint! Don’t forget, if you sign up for Jewelmint, use code bos990 for 50% off your first month, c/o the Boston MBA Team.

IMG_7394 IMG_7400 copy IMG_7311 copy copy IMG_7422 copy copy

sweater: H&M; Buffalo Exchange

skirt: swapped and DIYed

tights: Urban Outfitters

pin:  Jewelmint, use code bos990 for 50% off your first month, c/o the Boston MBA Team

boots: Steven Steve Madden

HANA Titanium

I have relatively straight hair. But after I shower, Sometimes I don’t comb it and let it air dry. So I end up with the frizzy, slightly wavy kind of straight. Which is fine some days. But most days, what I really want is that sleek, pin straight kind of straight :) So I reach for the straightener. 

When the people at www.misikko.com contacted me and asked me if I would like to try their HANA Titanium 1.5” Flat Iron, I couldn’t pass it up. Misikko is a site that specializes in salon grade flat irons, curling irons, and CHI hair dryers. So when I received my package ( filled with a whole bunch of really good stuff! they do a great job ), I was pretty excited. 

And it didn’t let me down. It heated up nicely, the temperature adjusted perfect, my hair didn’t snag, and I was done straightening in only a few minutes. It worked perfectly, and fast, and I would definitely recommend it. 

The only down fall is that they are very pricey. But if you are able to invest in these tools, it would definitely be worth it. They will last you a long time - the quality is awesome.