handmade wardrobe // Witchy Vibes, mommy and me with Measure fabrics

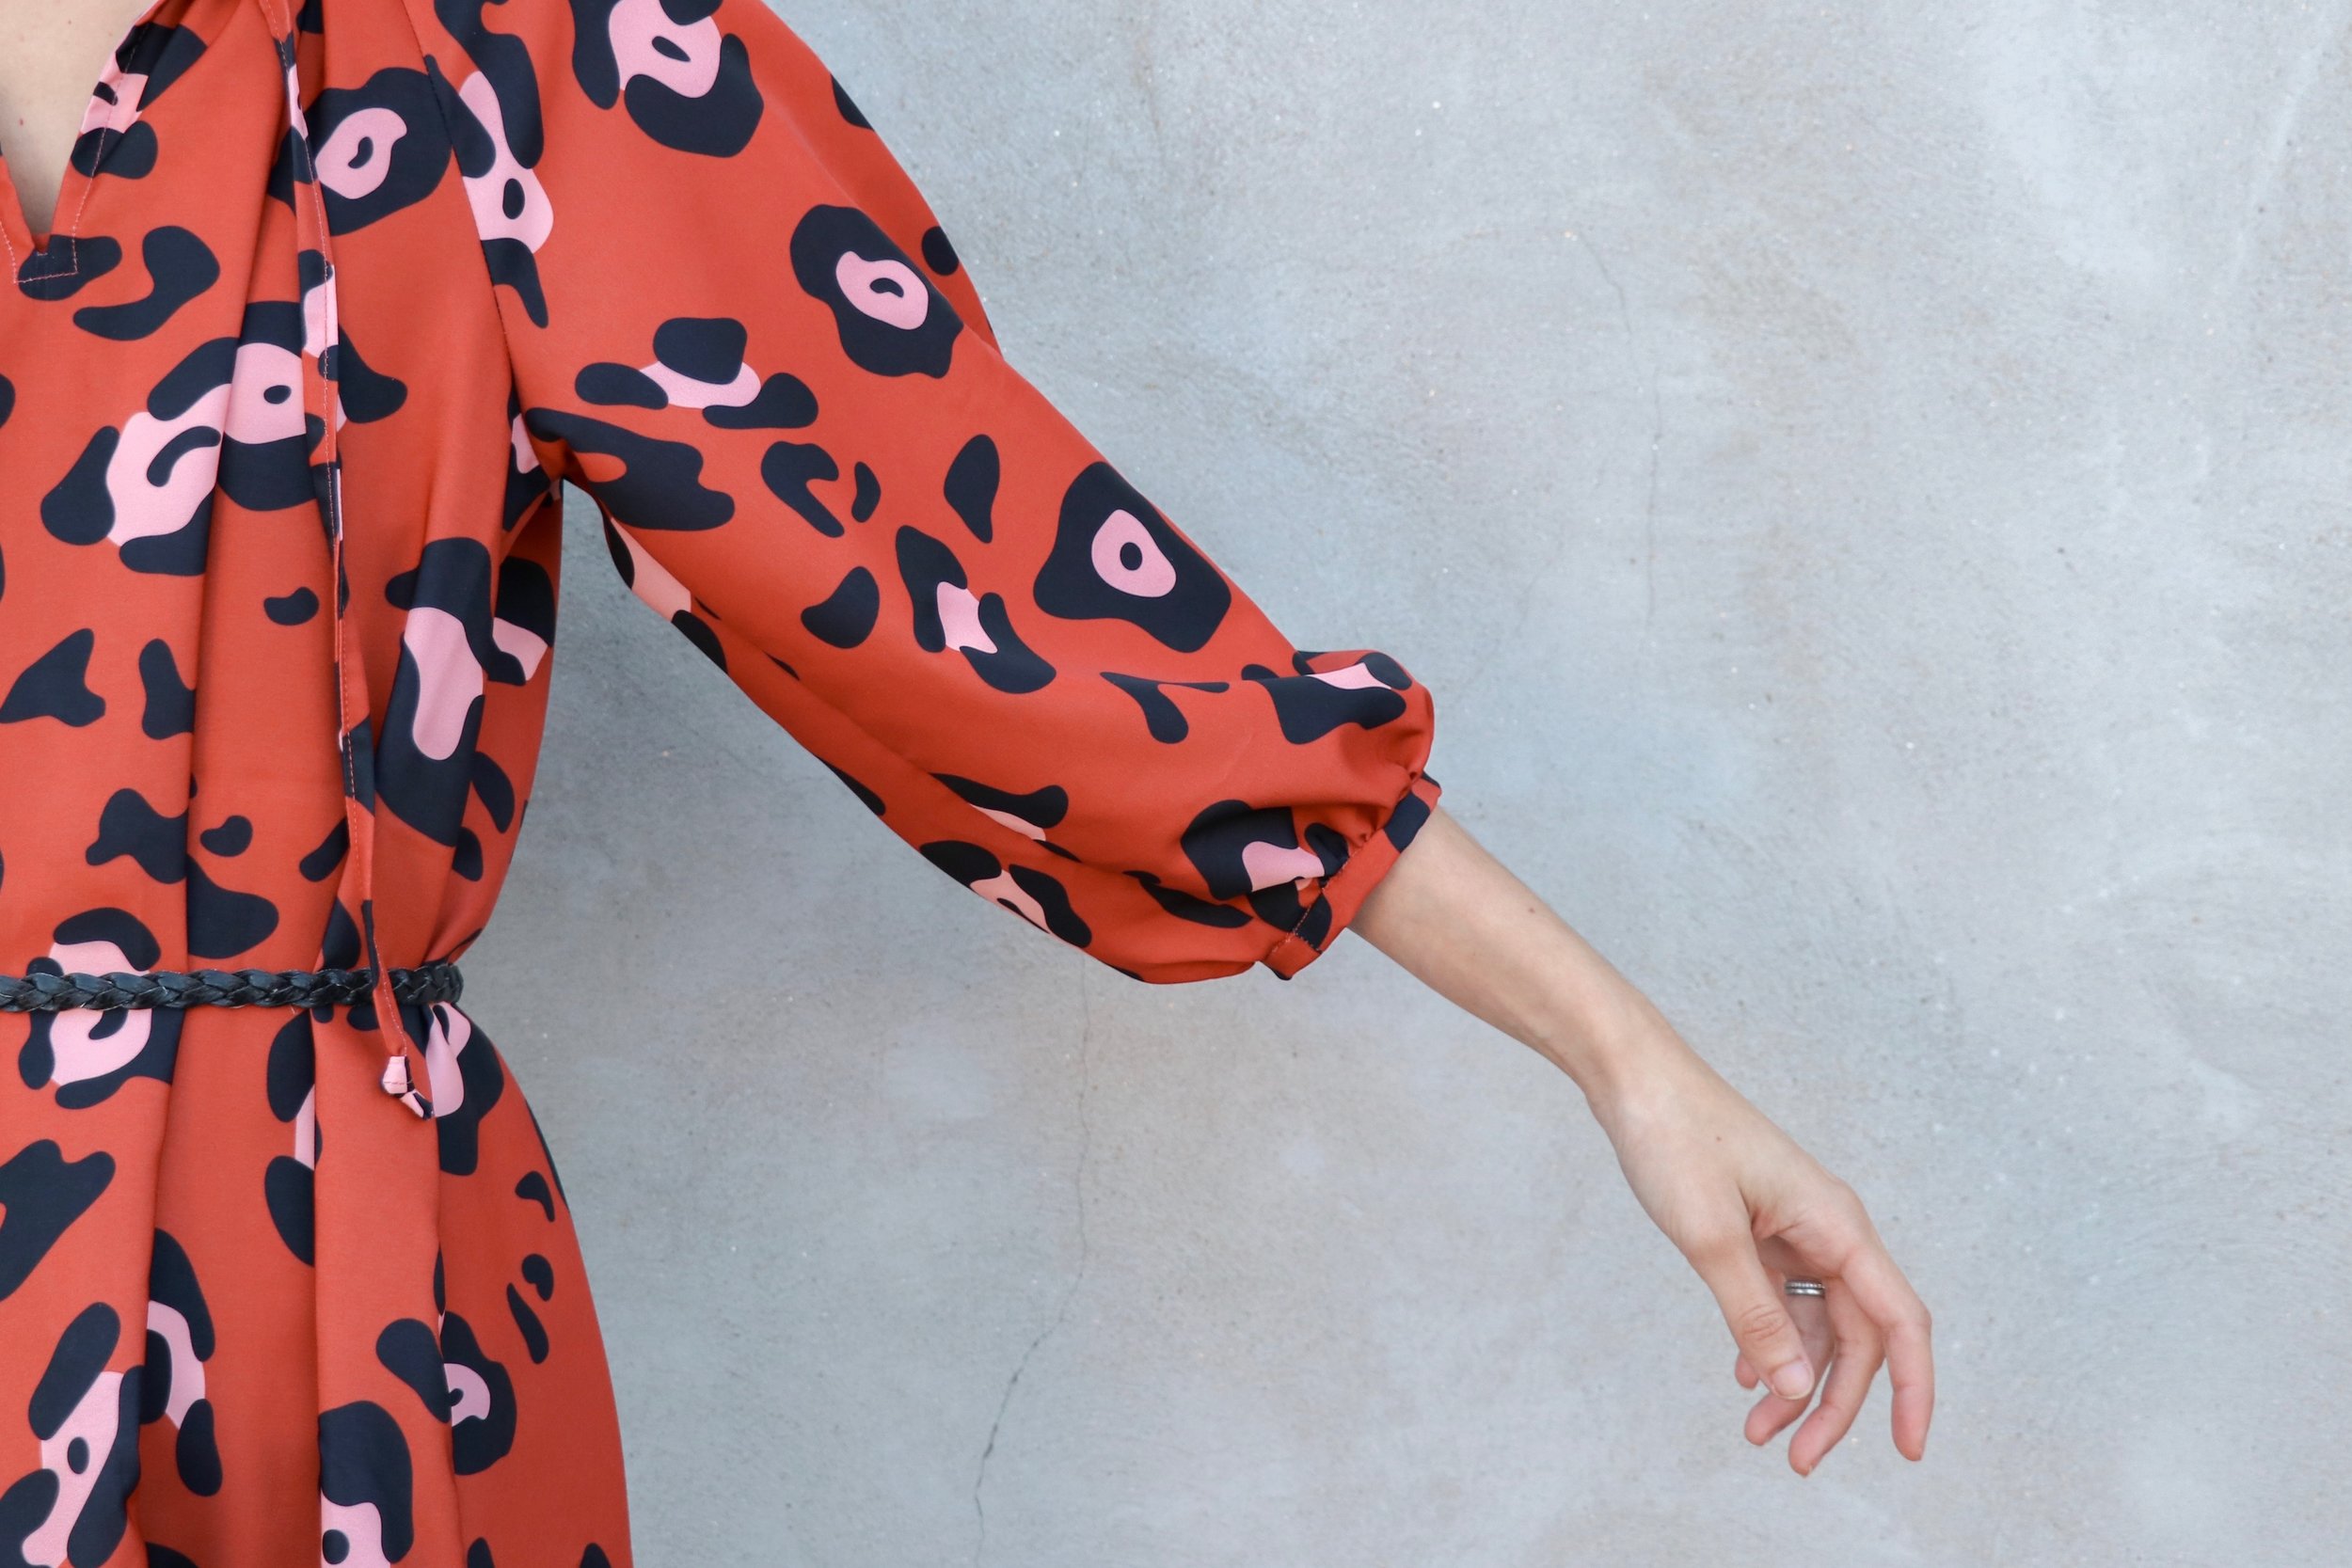
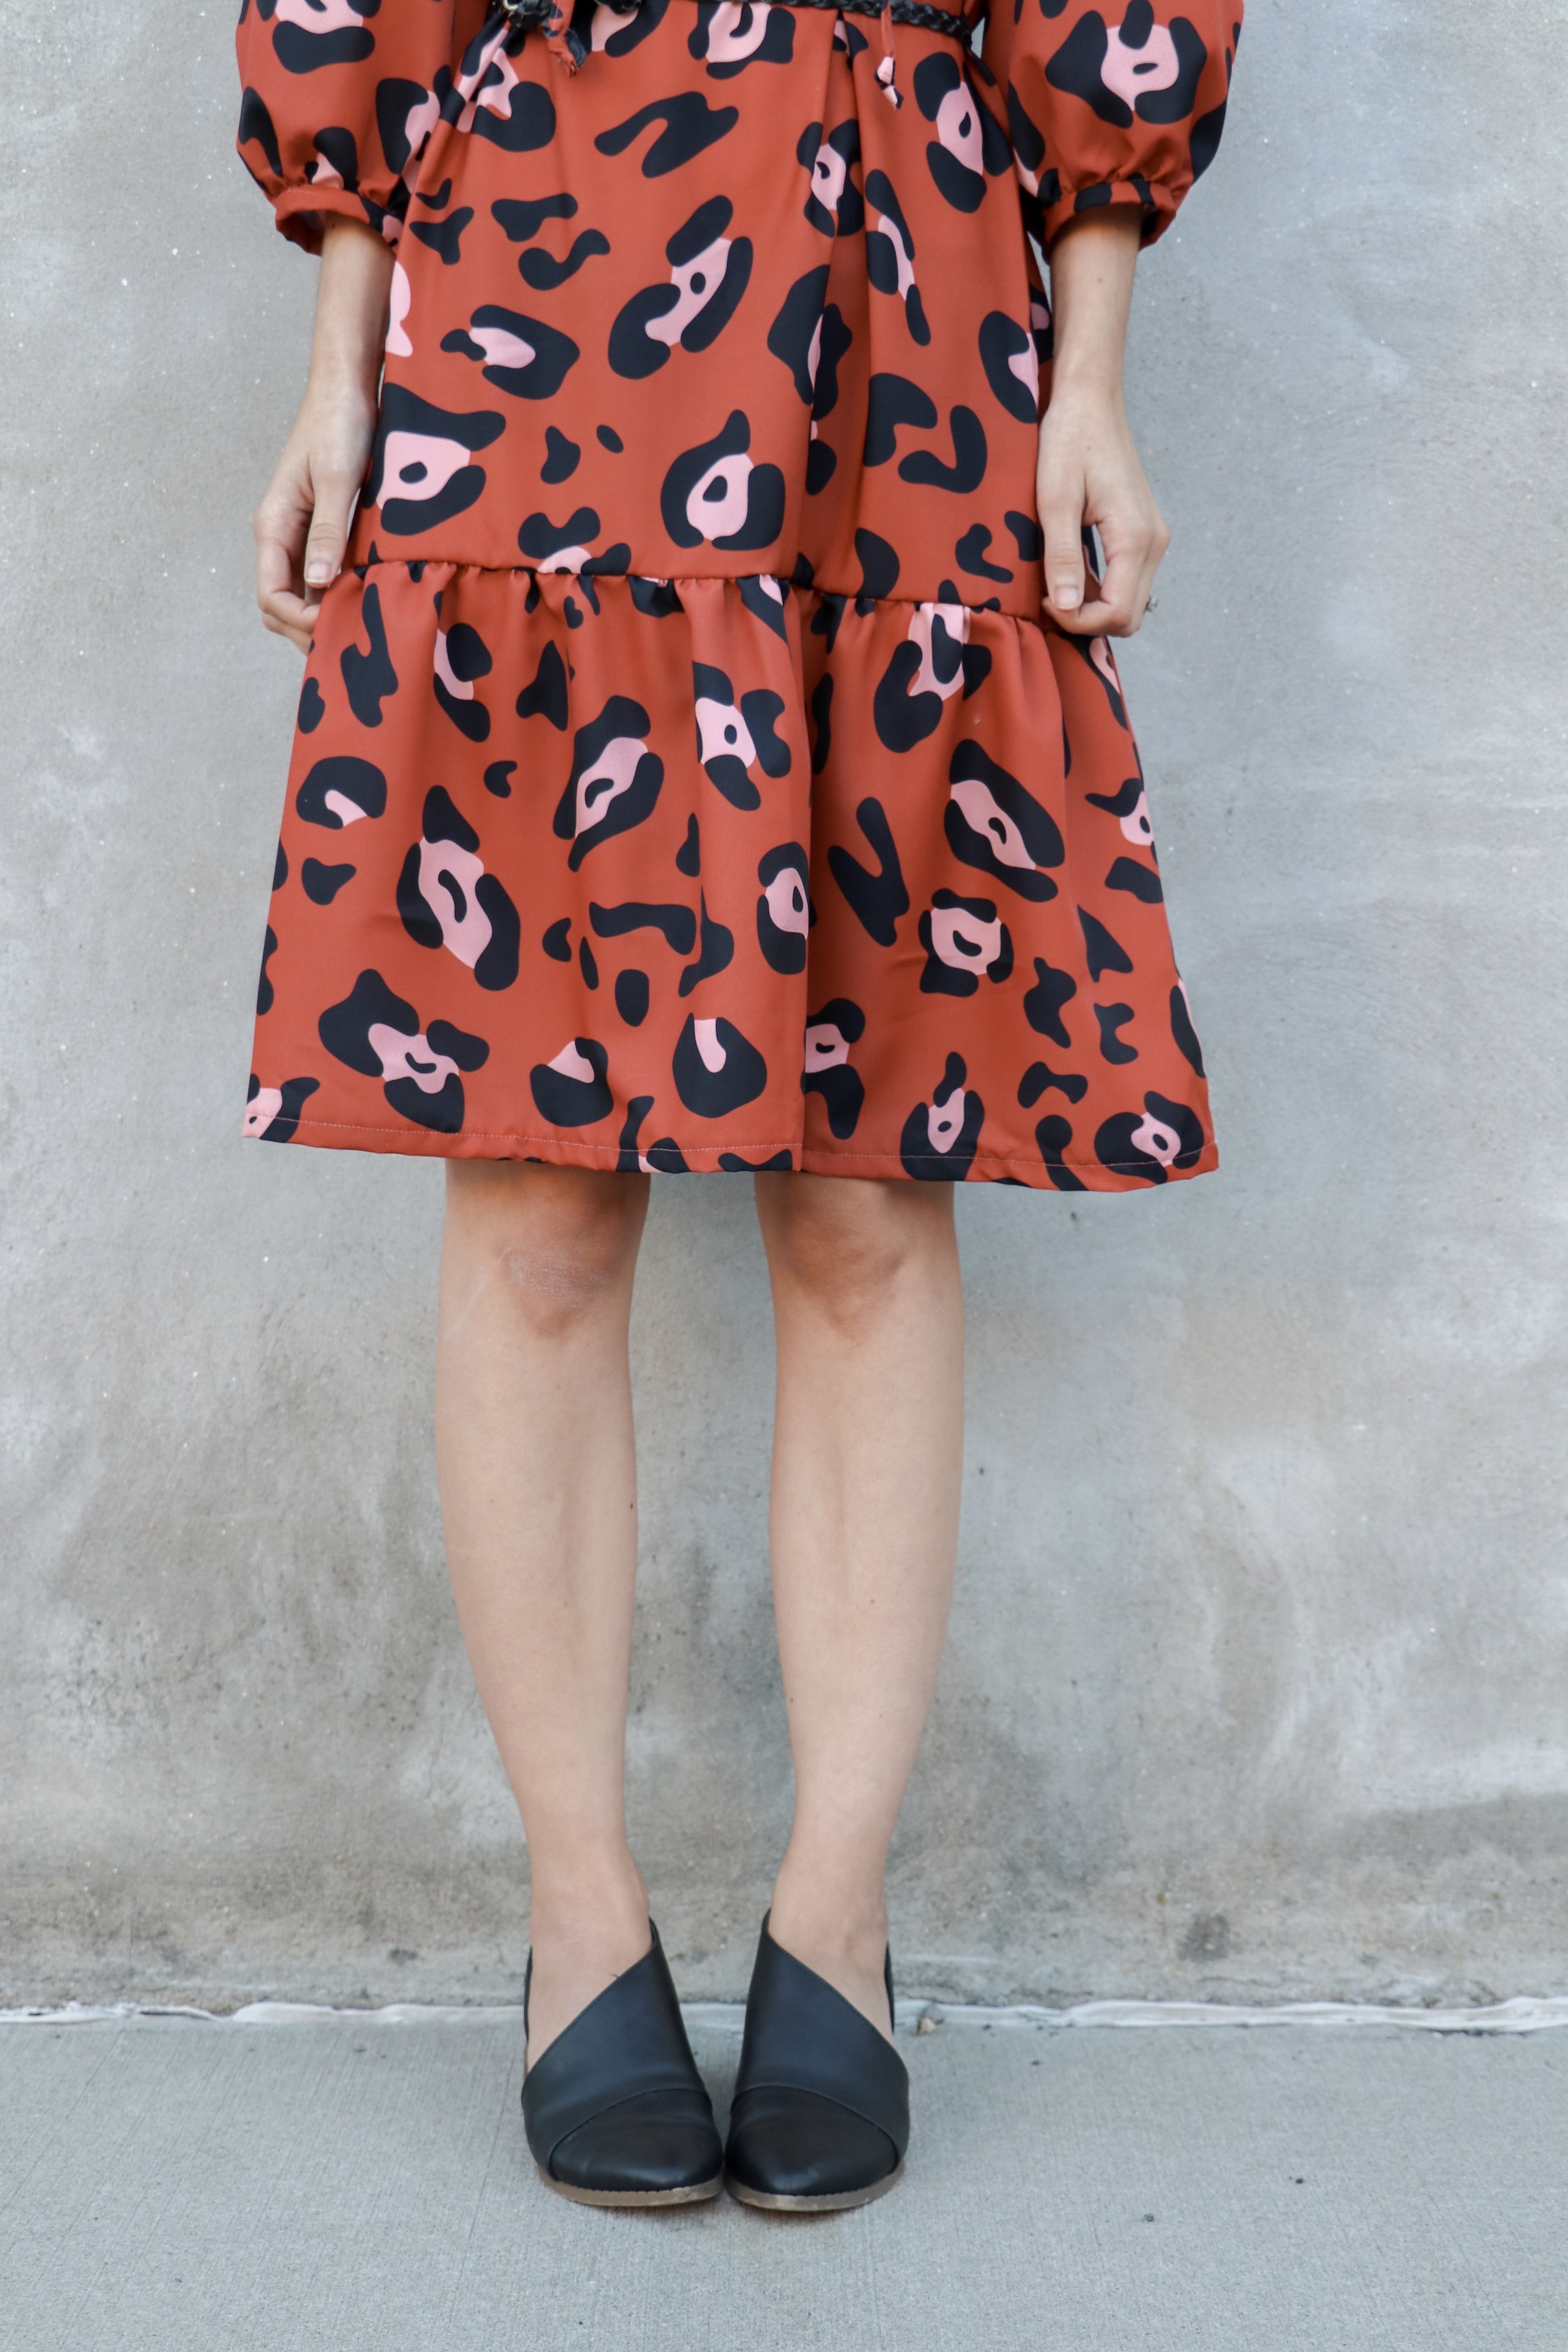
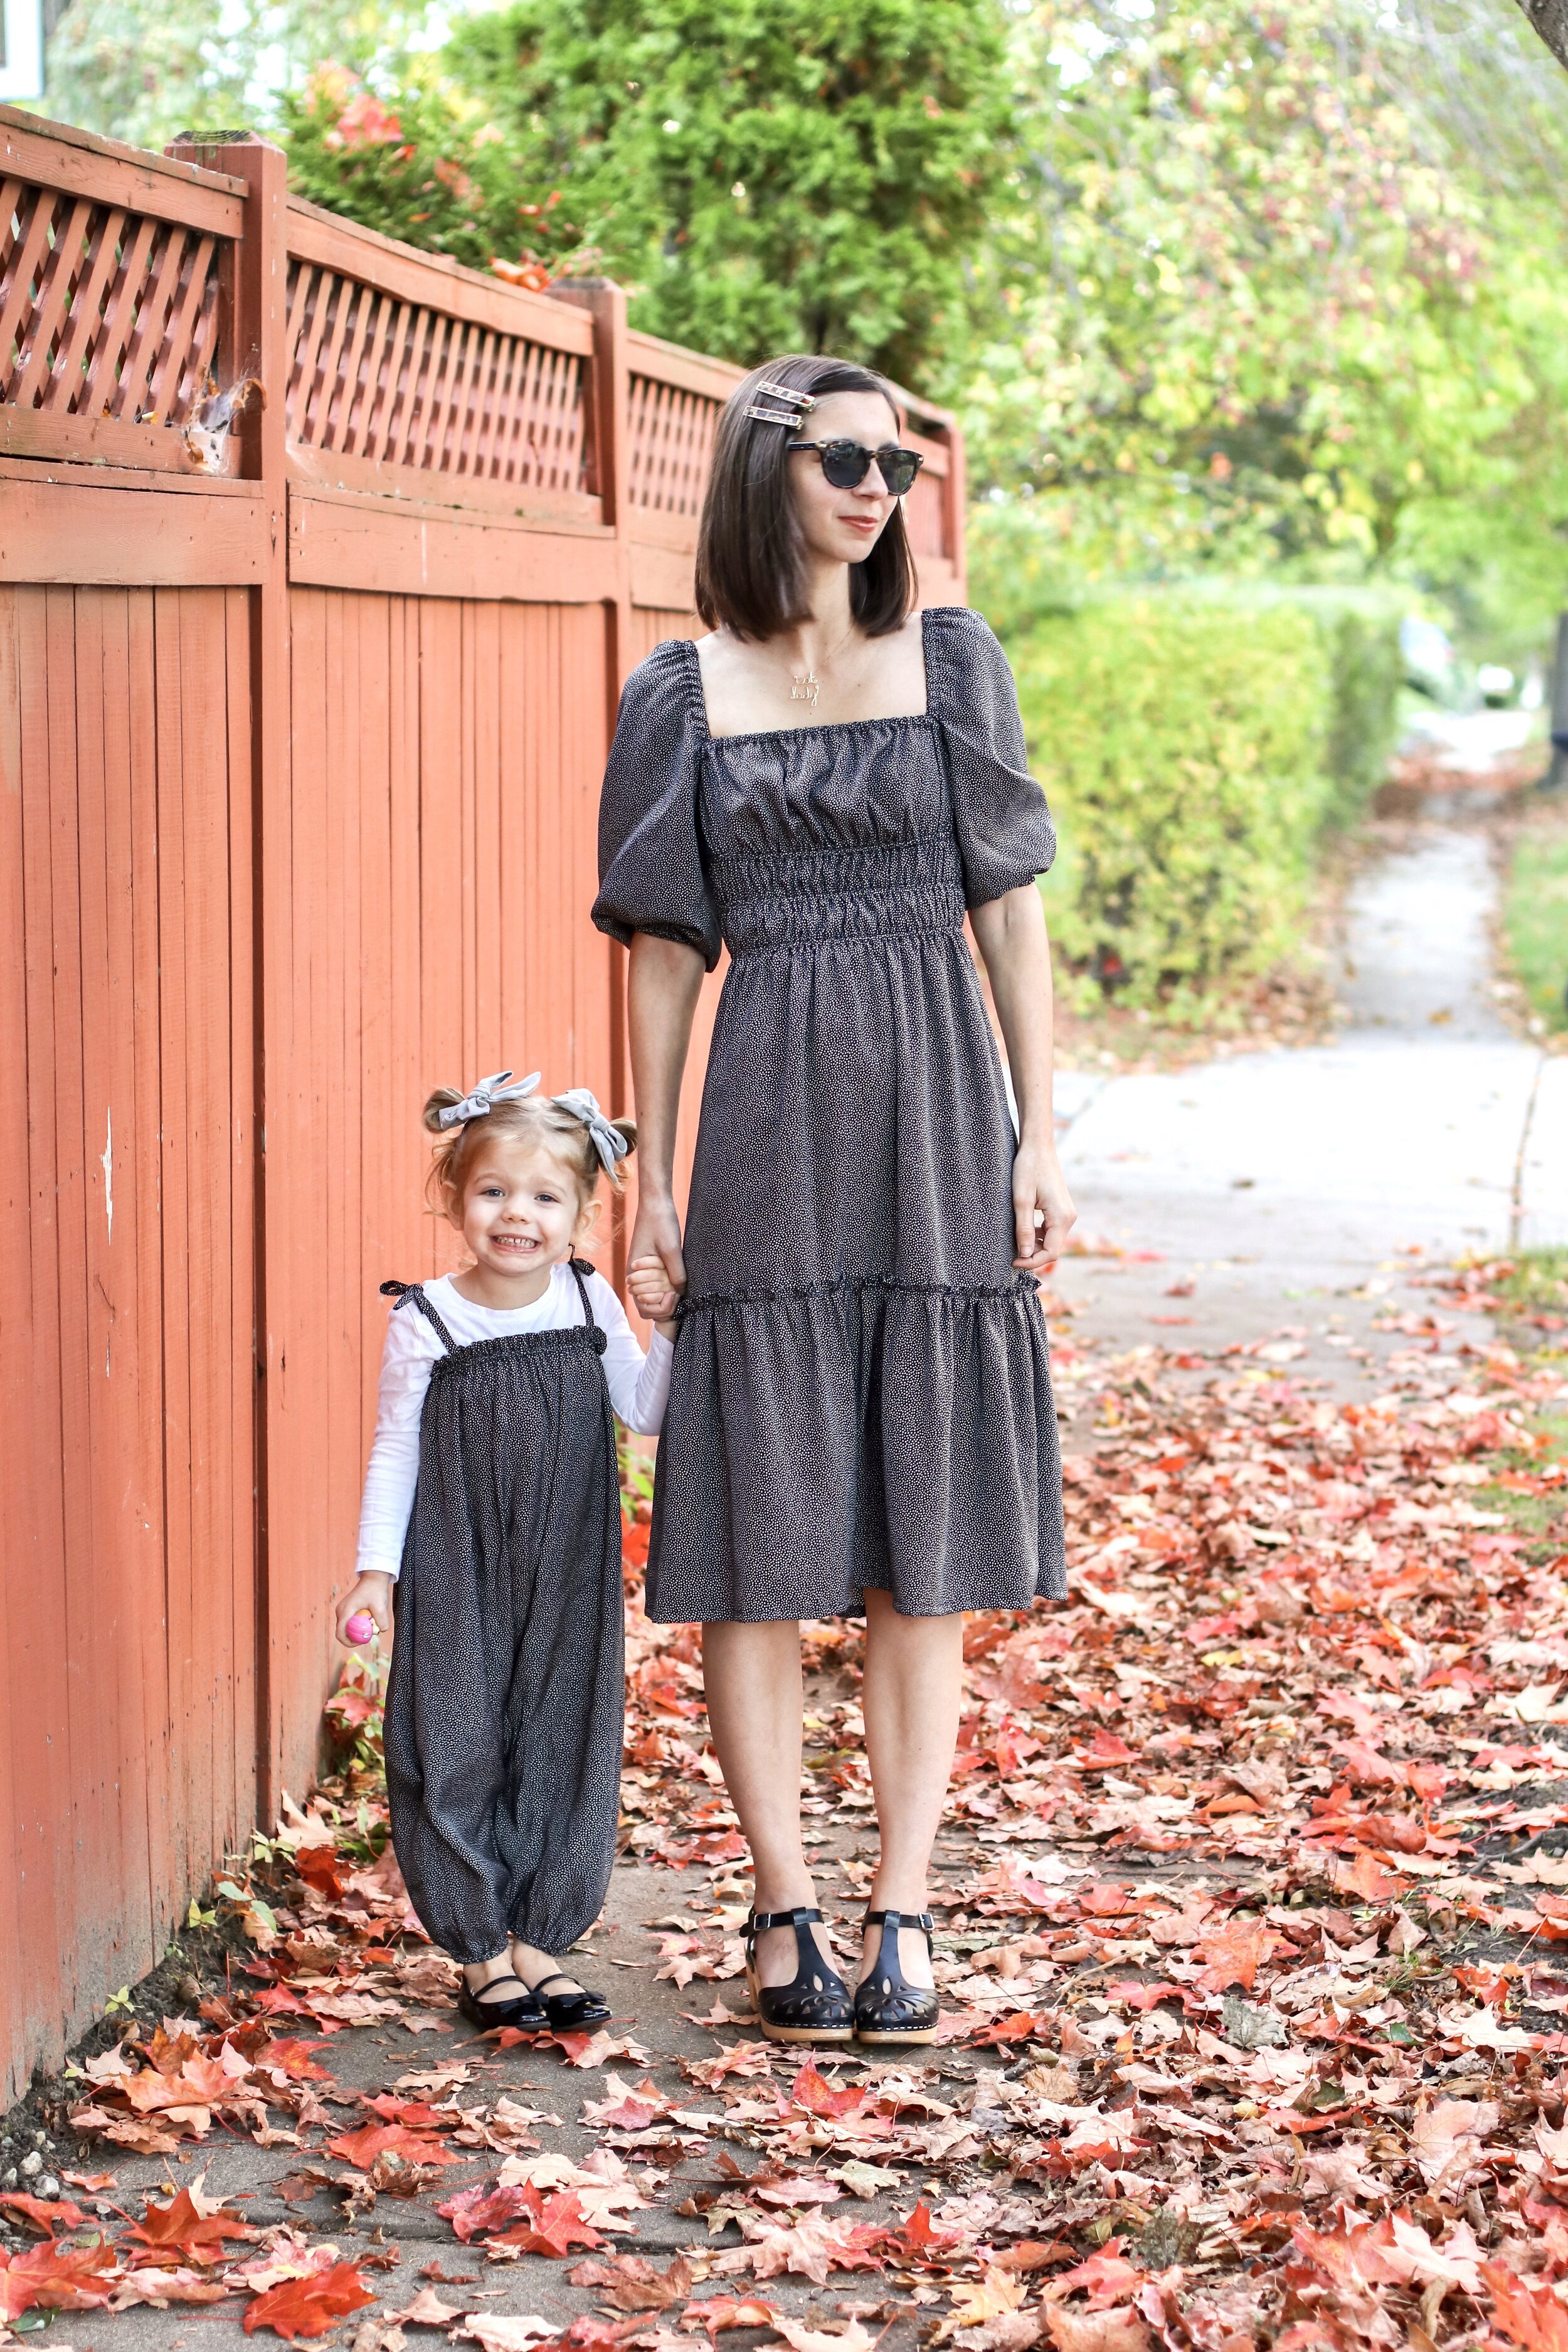
my dress: McCalls 7946 in a tiny dot silk/cotton twill from Measure Fabrics

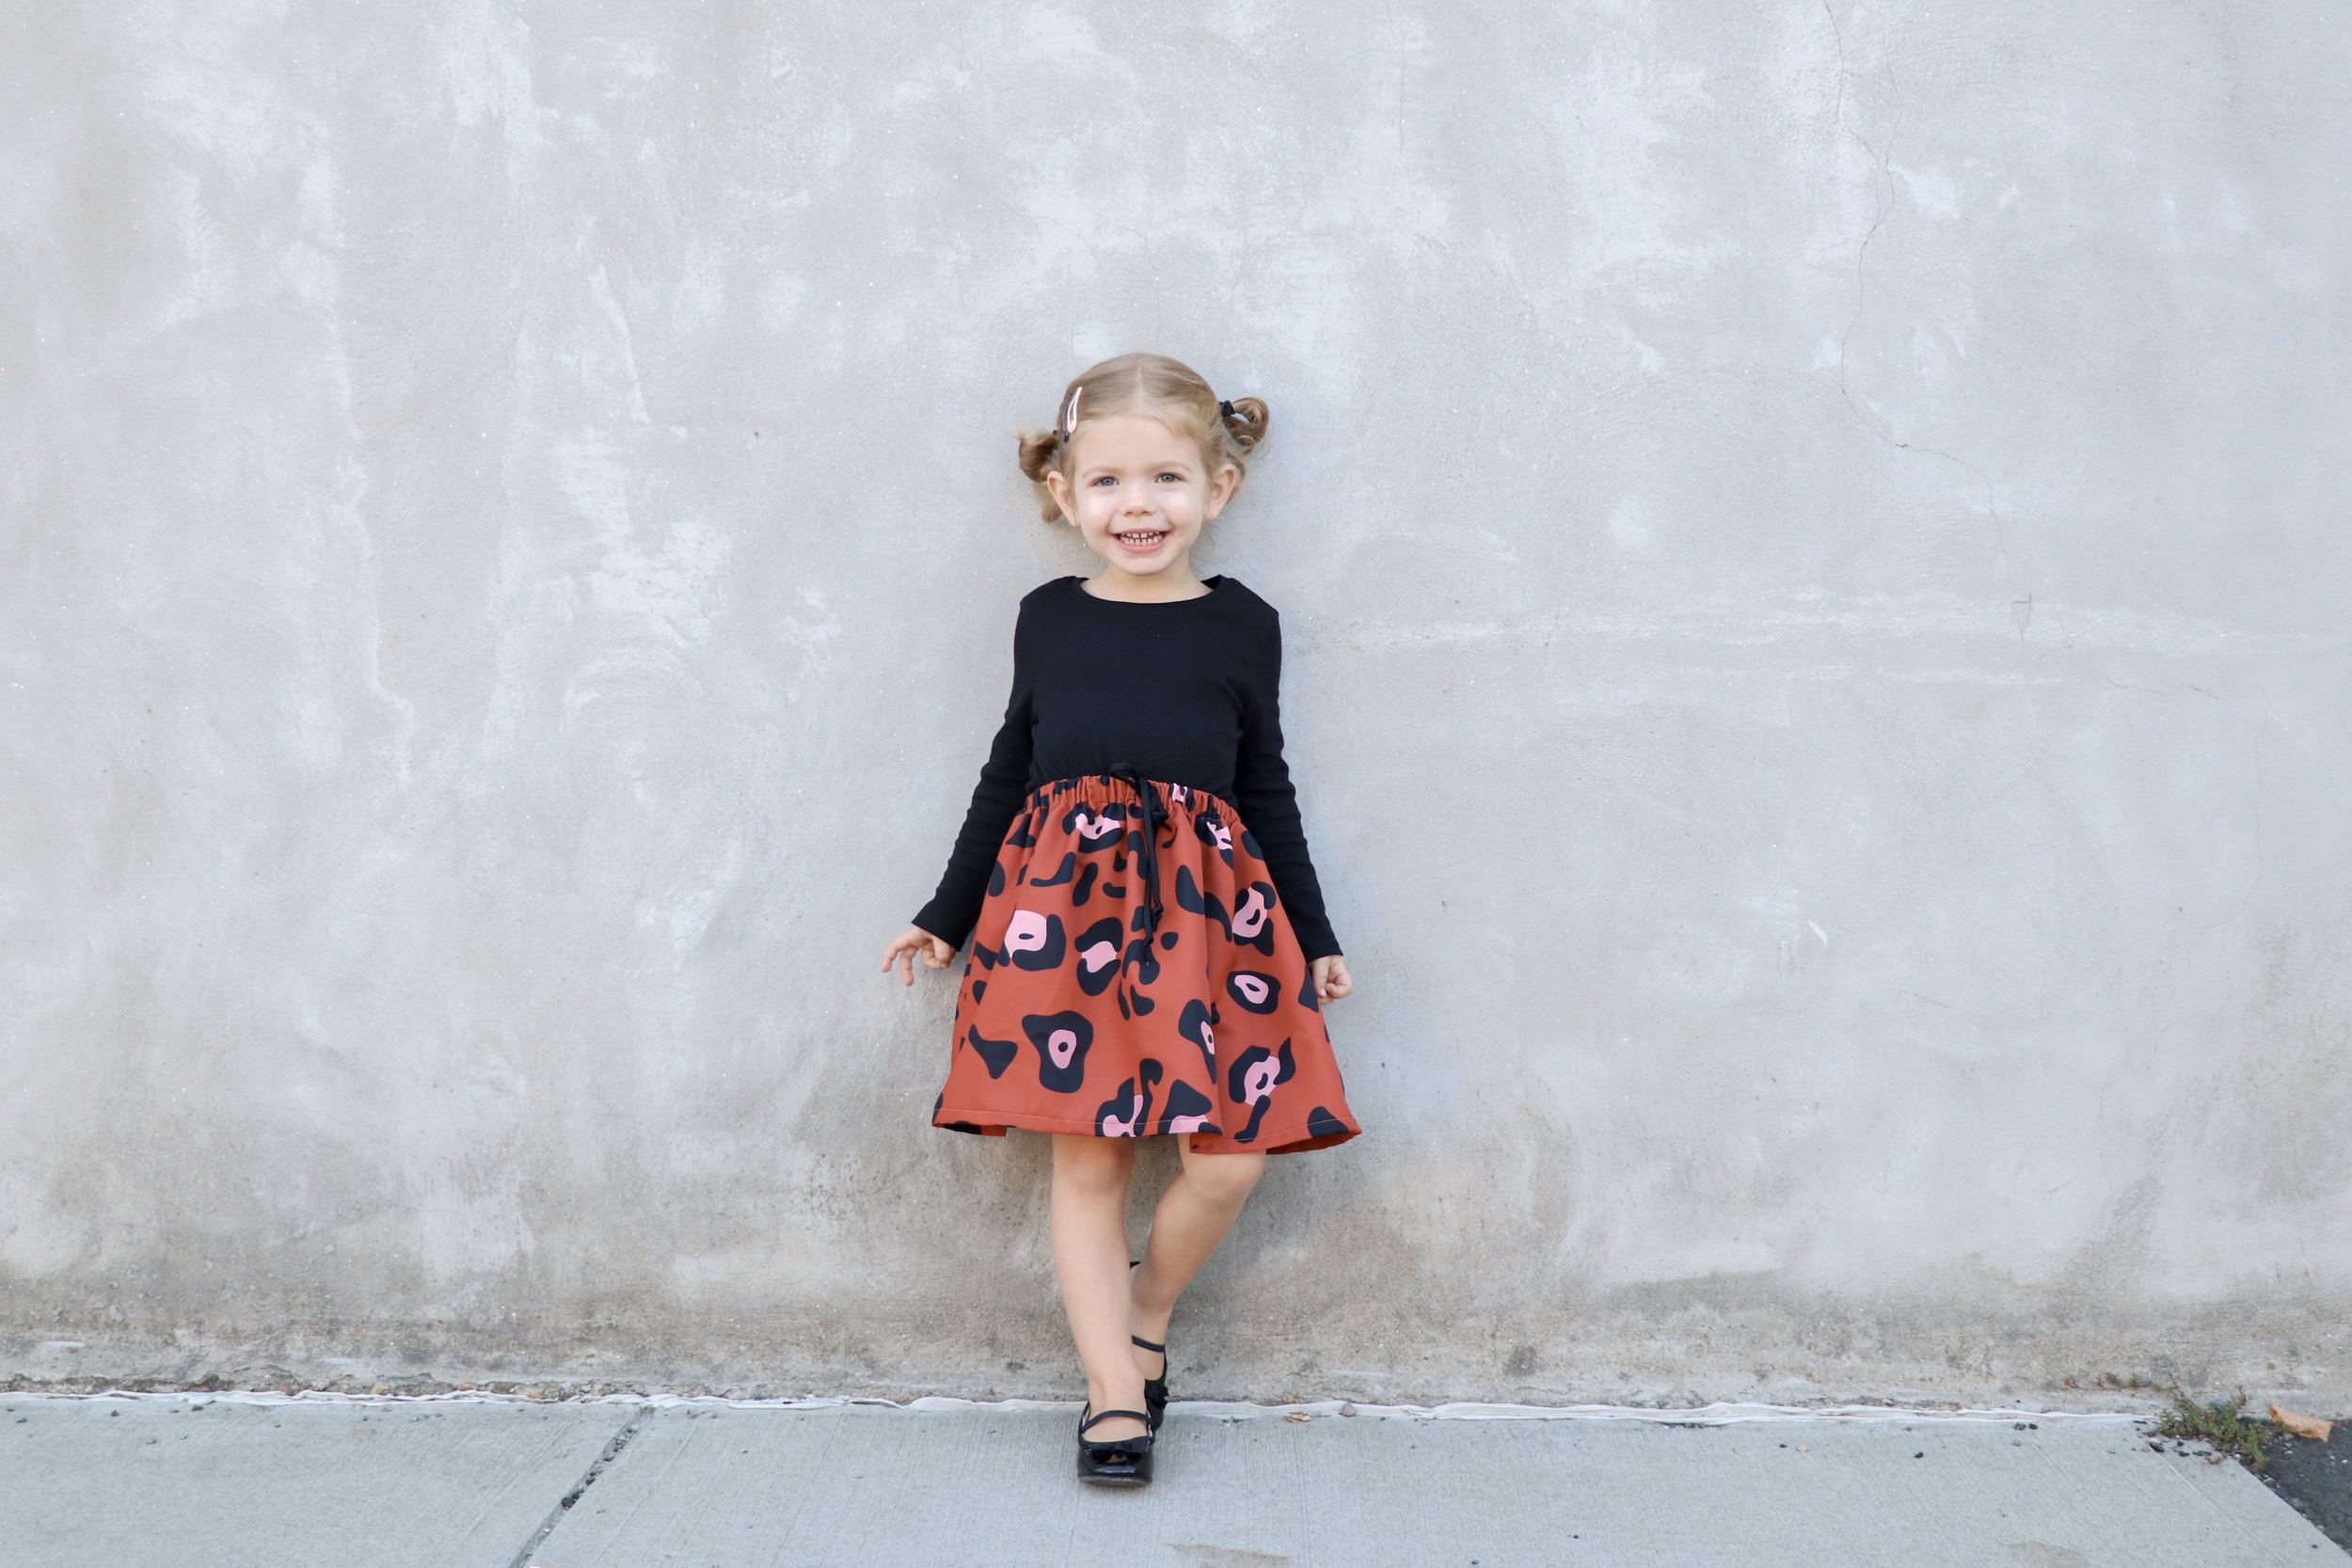
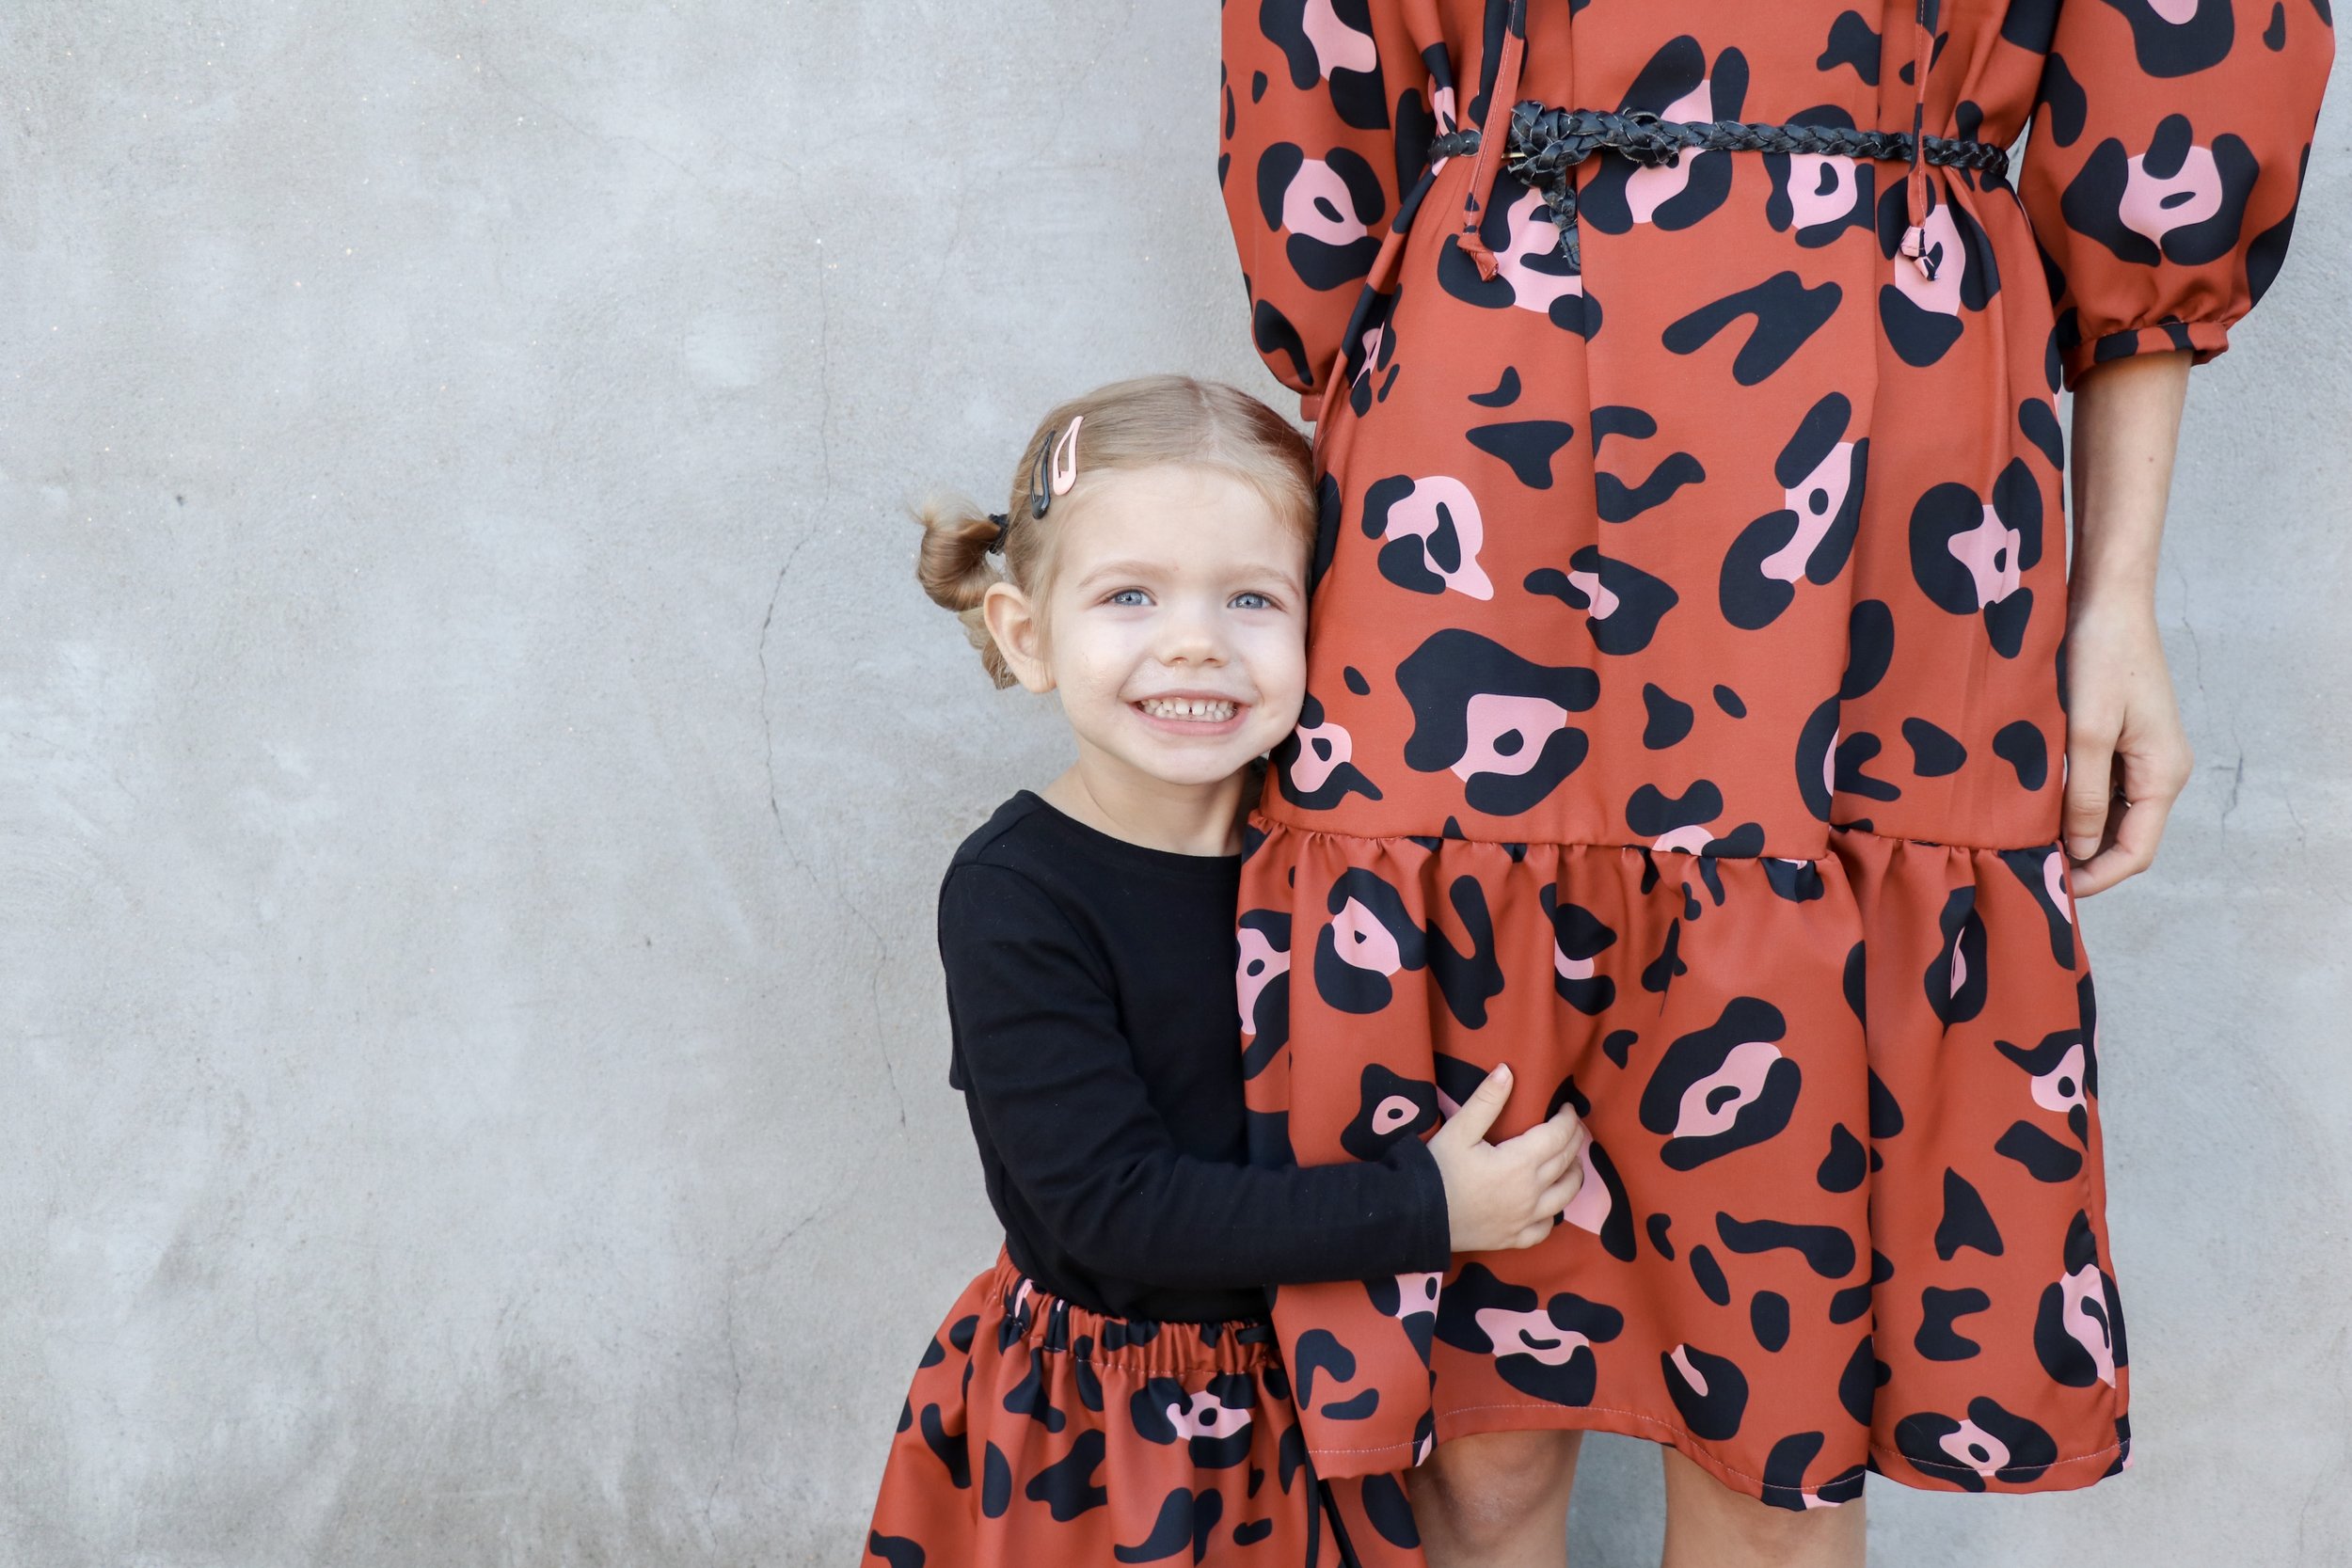
Penny’s jumpsuit: Hello Dear Kids harem jumpsuit, in same fabric

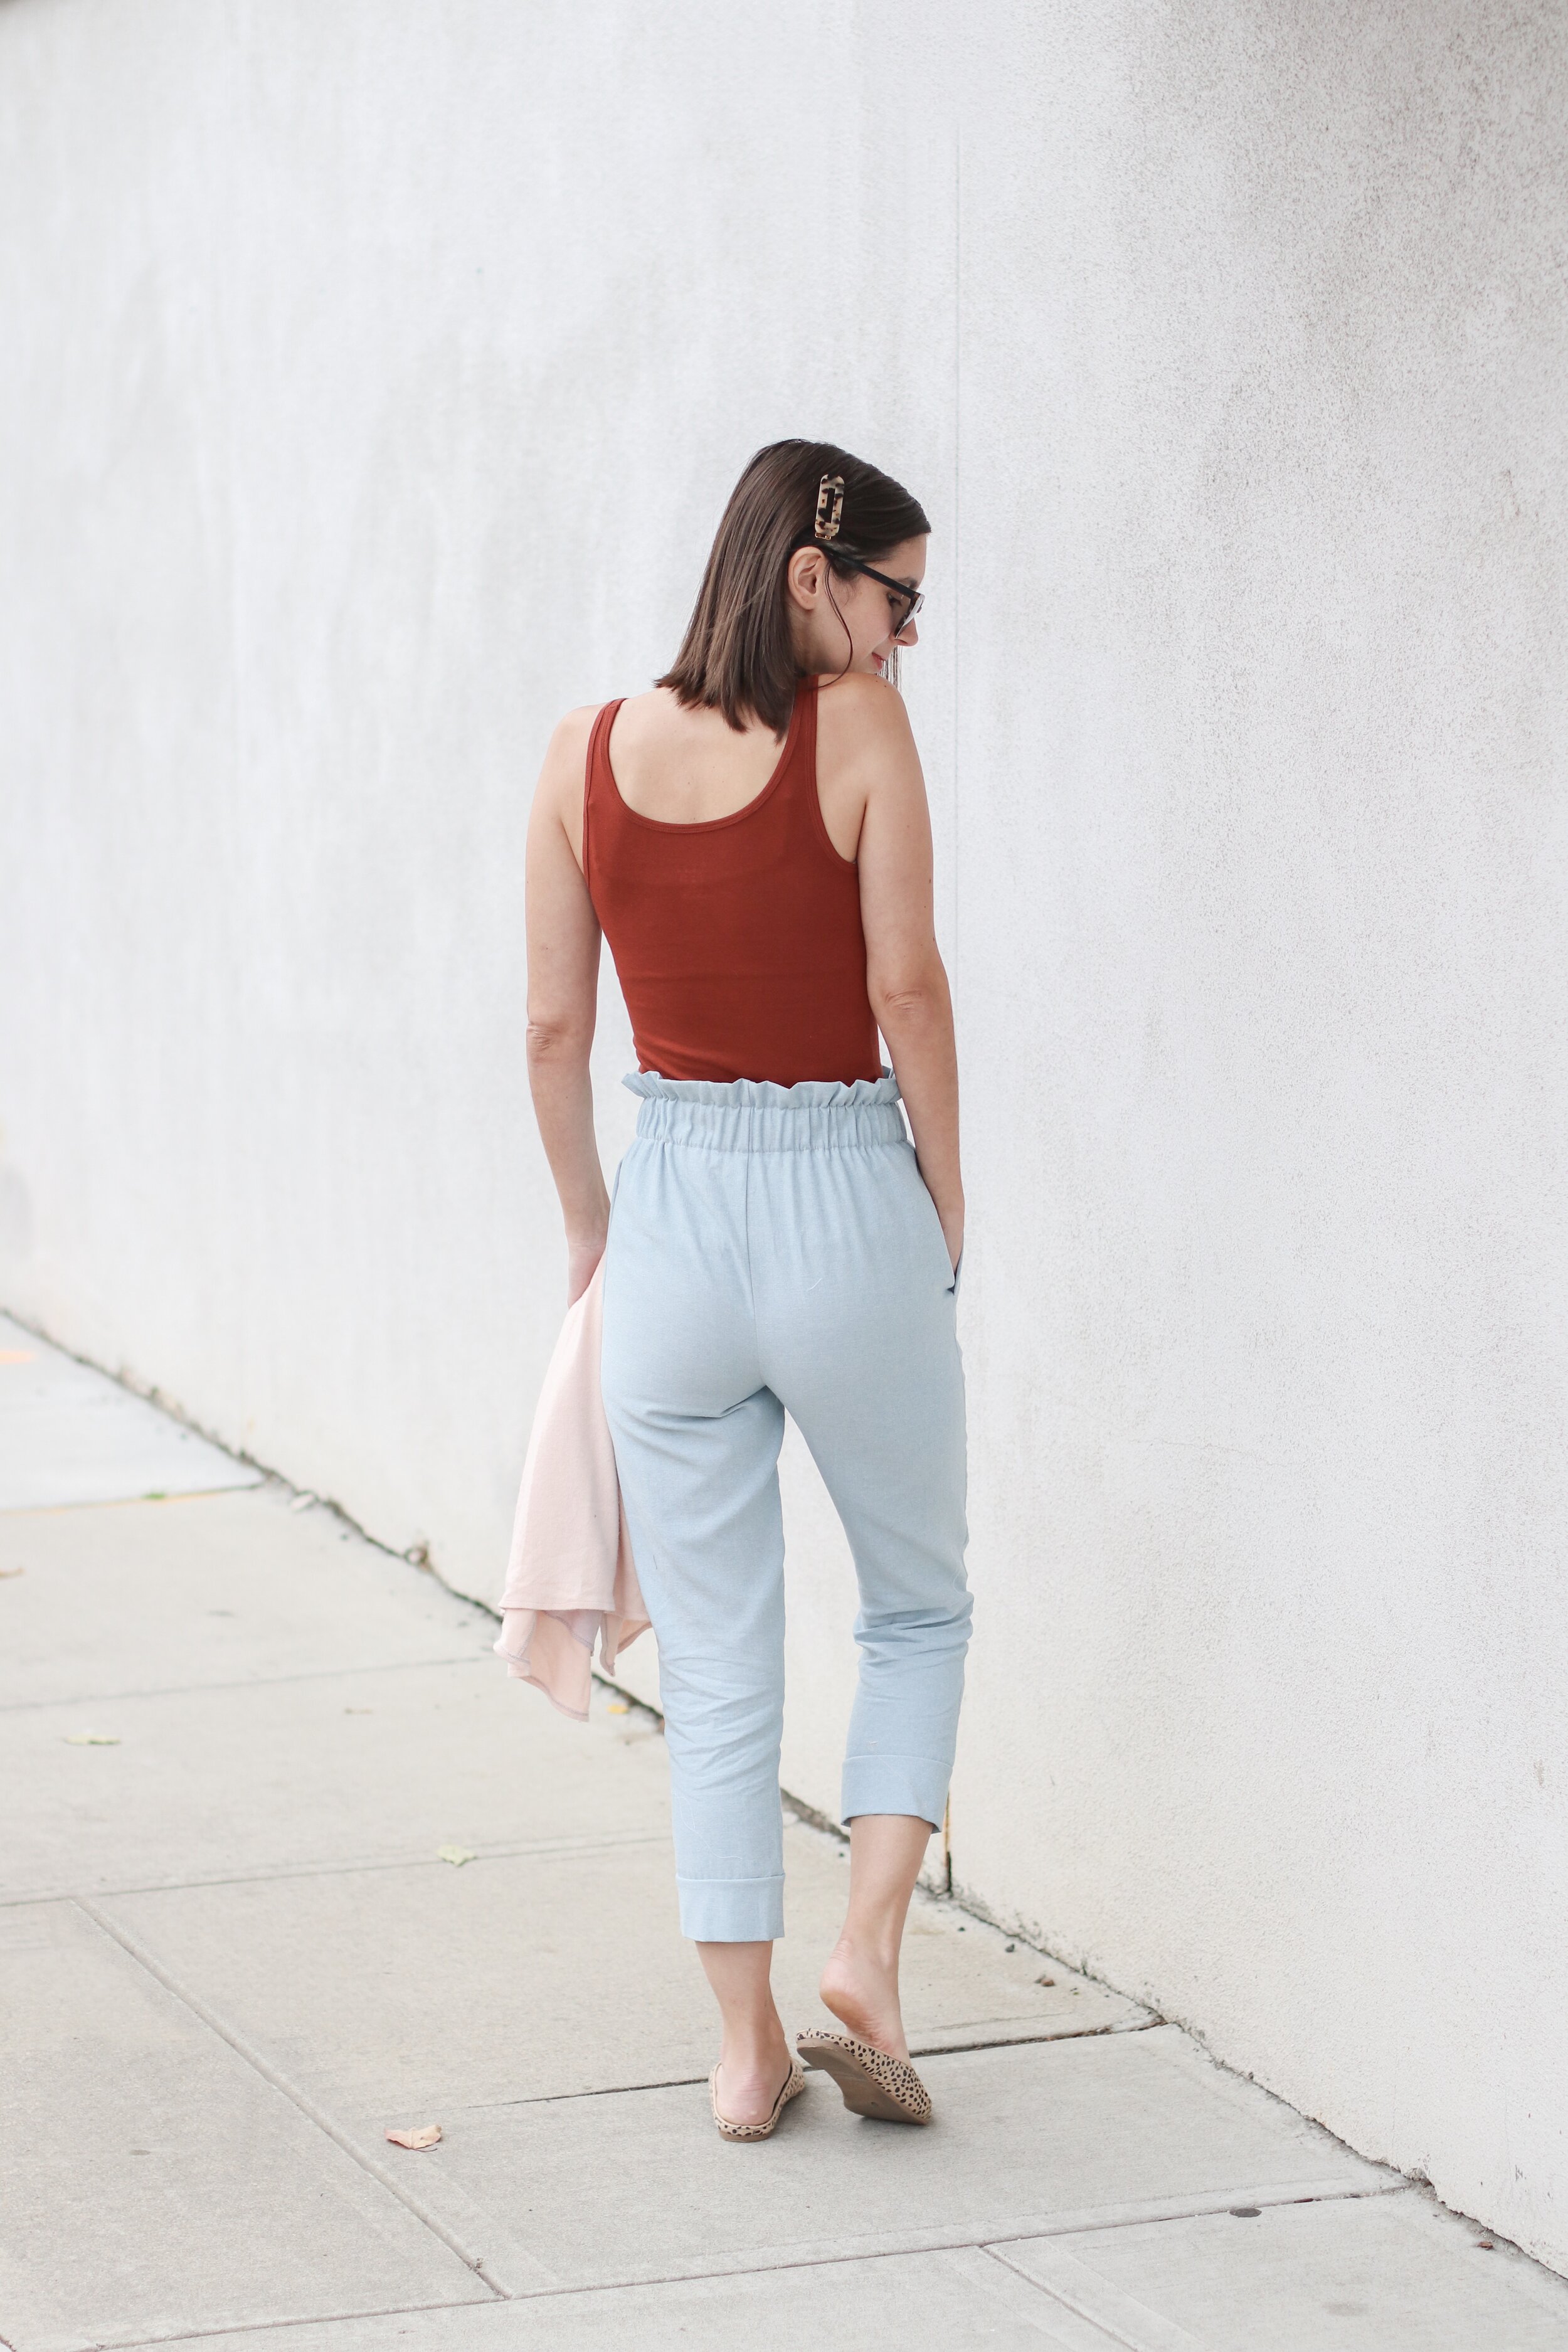
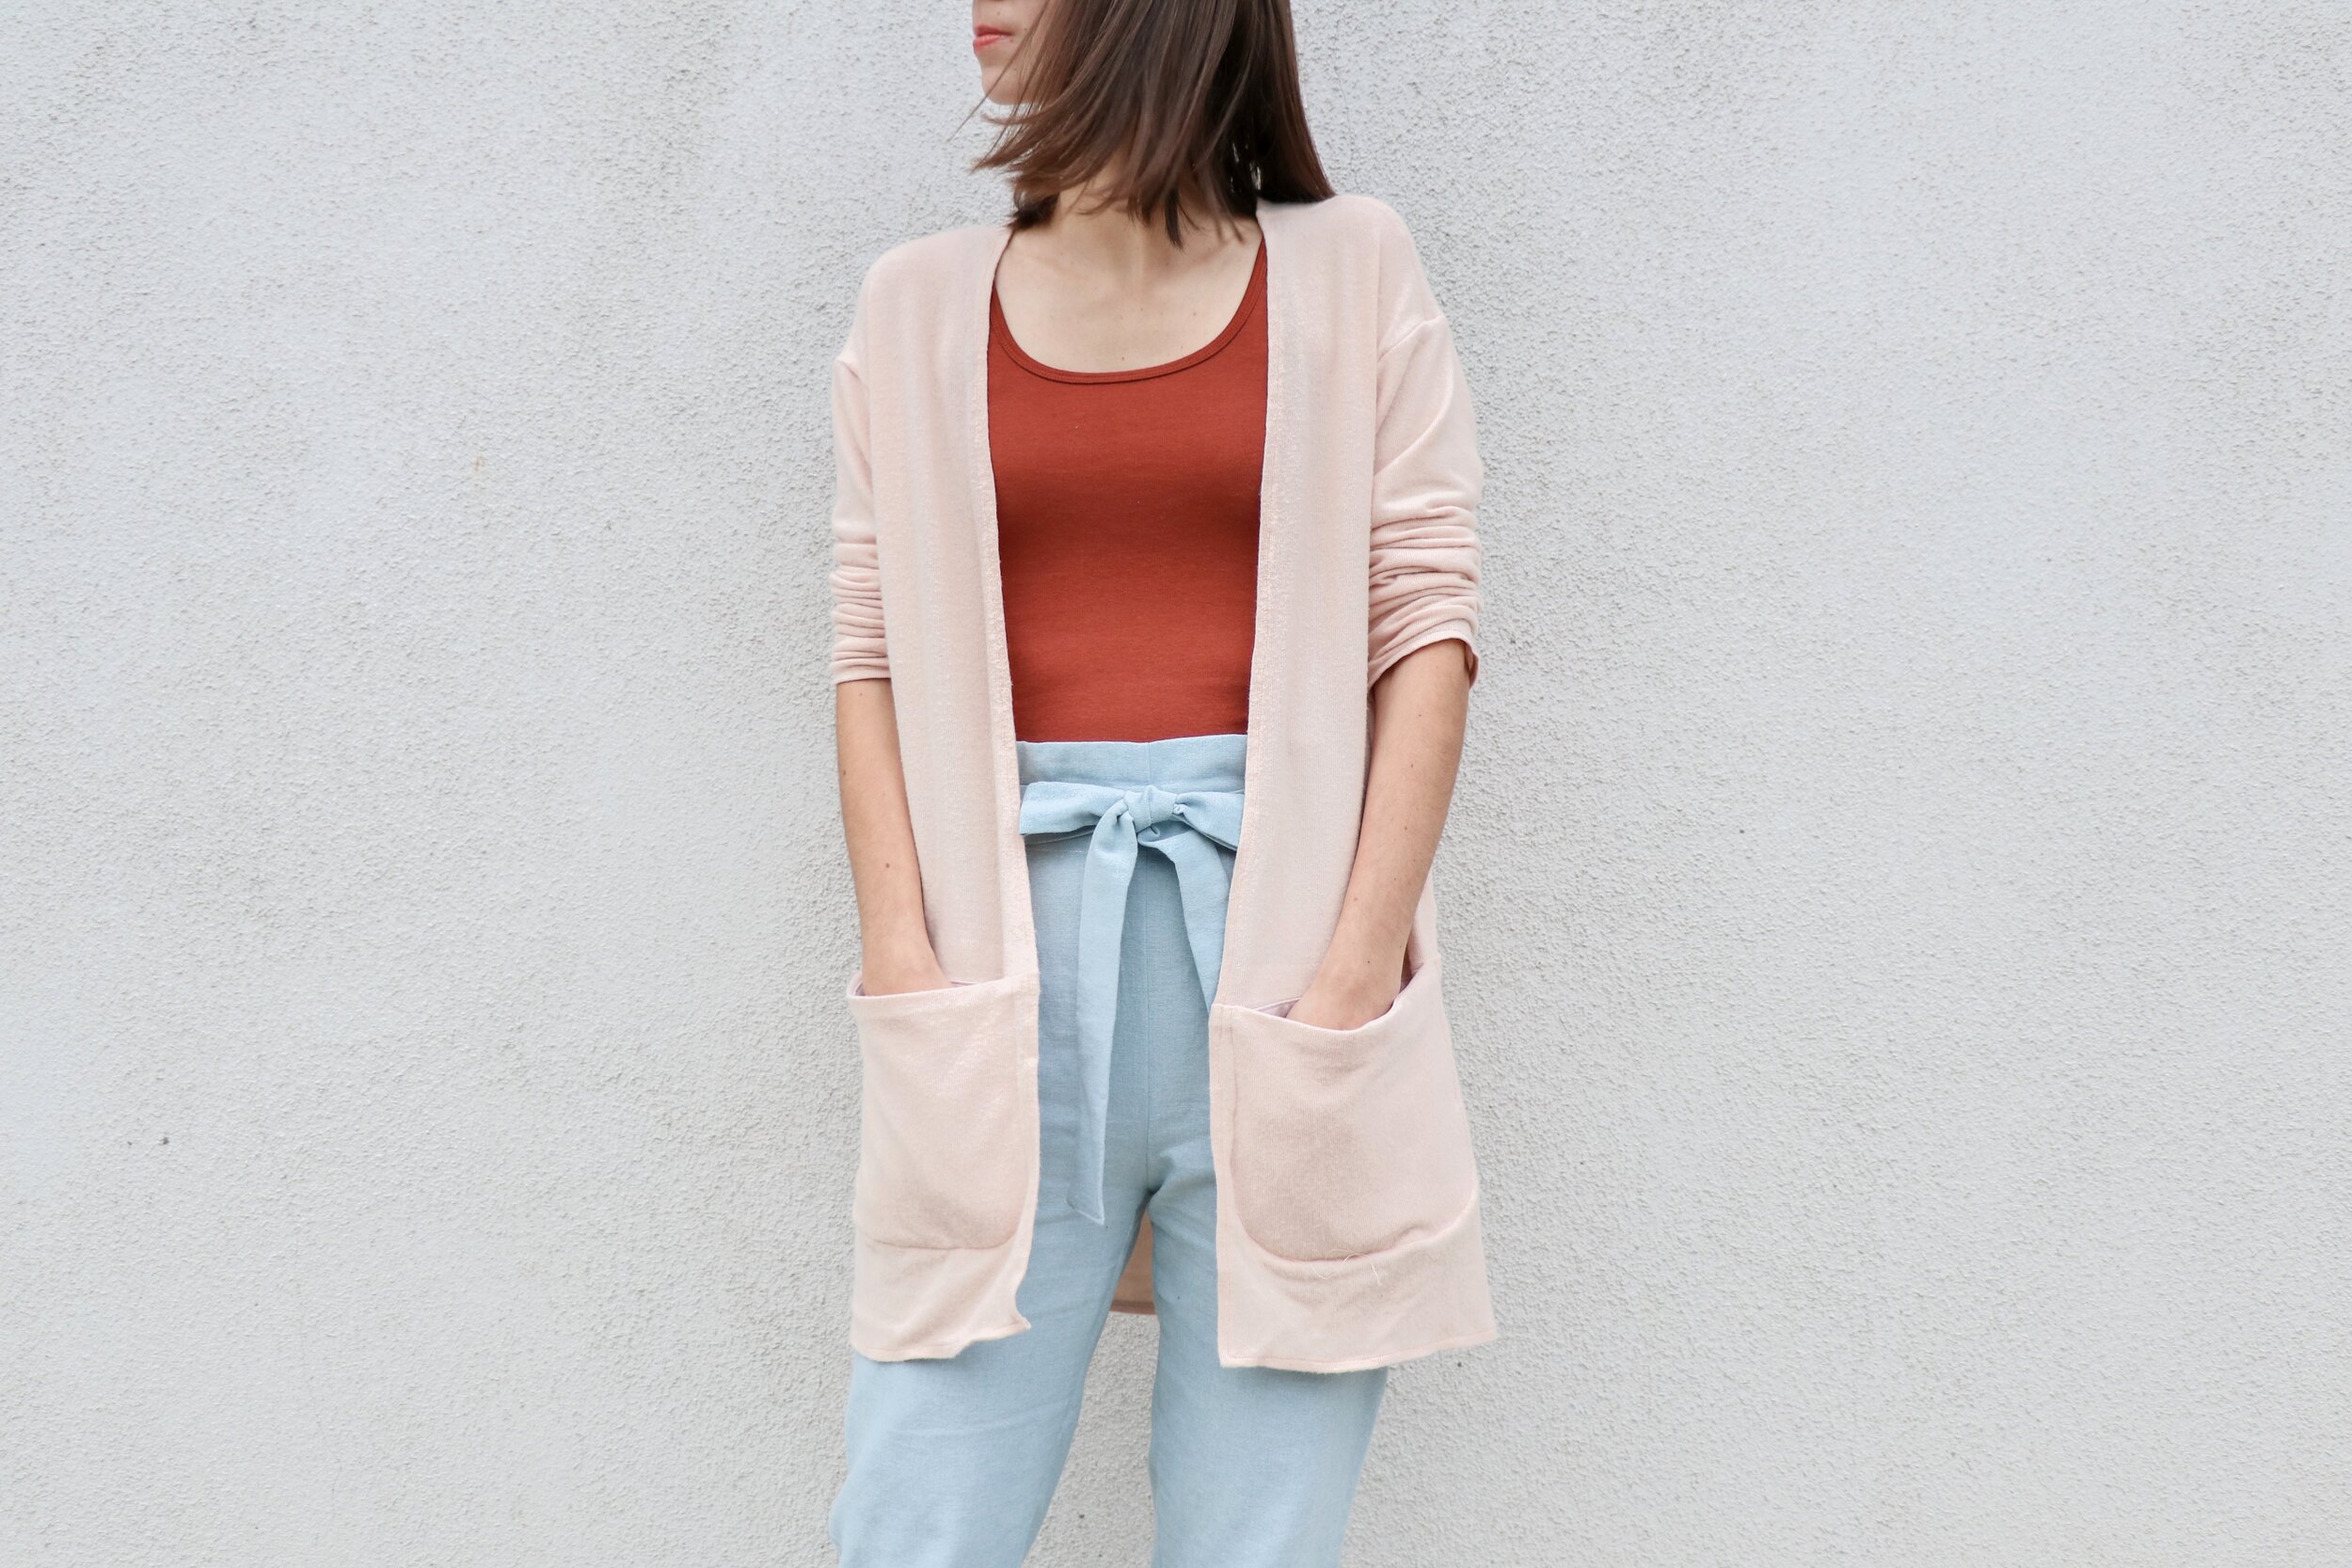
my shoes: Swedish Hasbeens

Penny’s hair bows: June and January

———————————————————————————

Seriously feeling these October witchy vibes in this look.

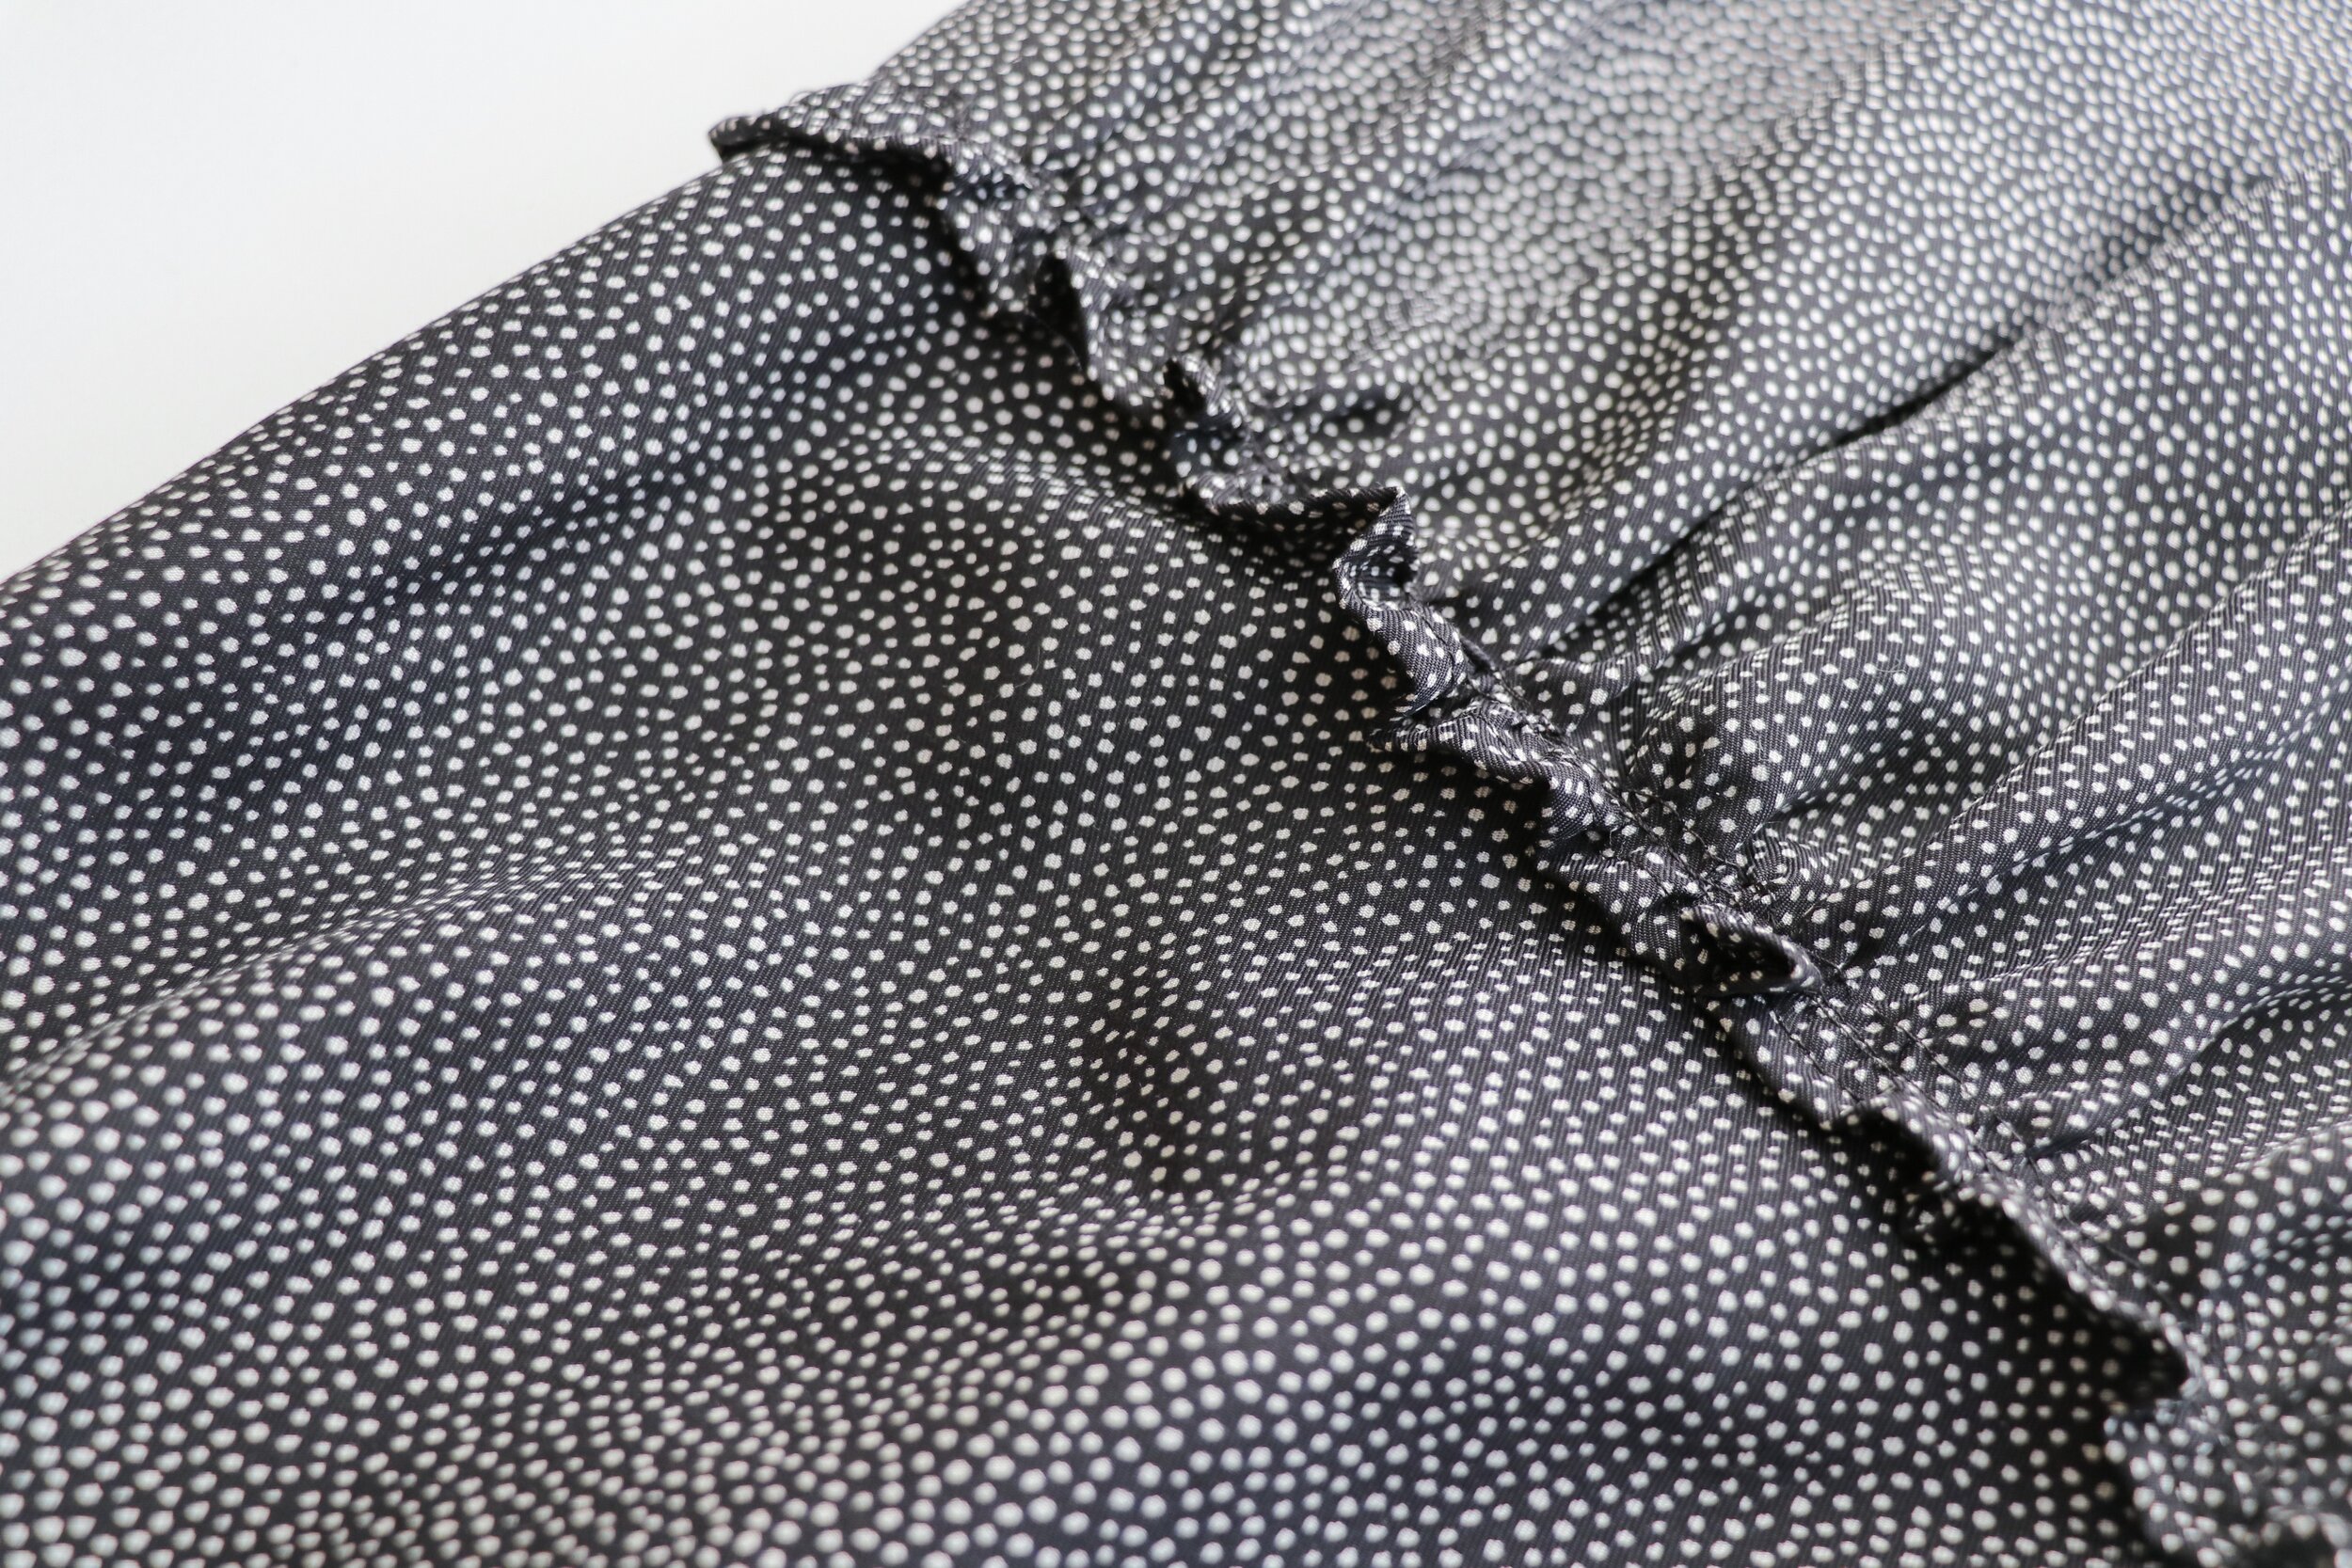
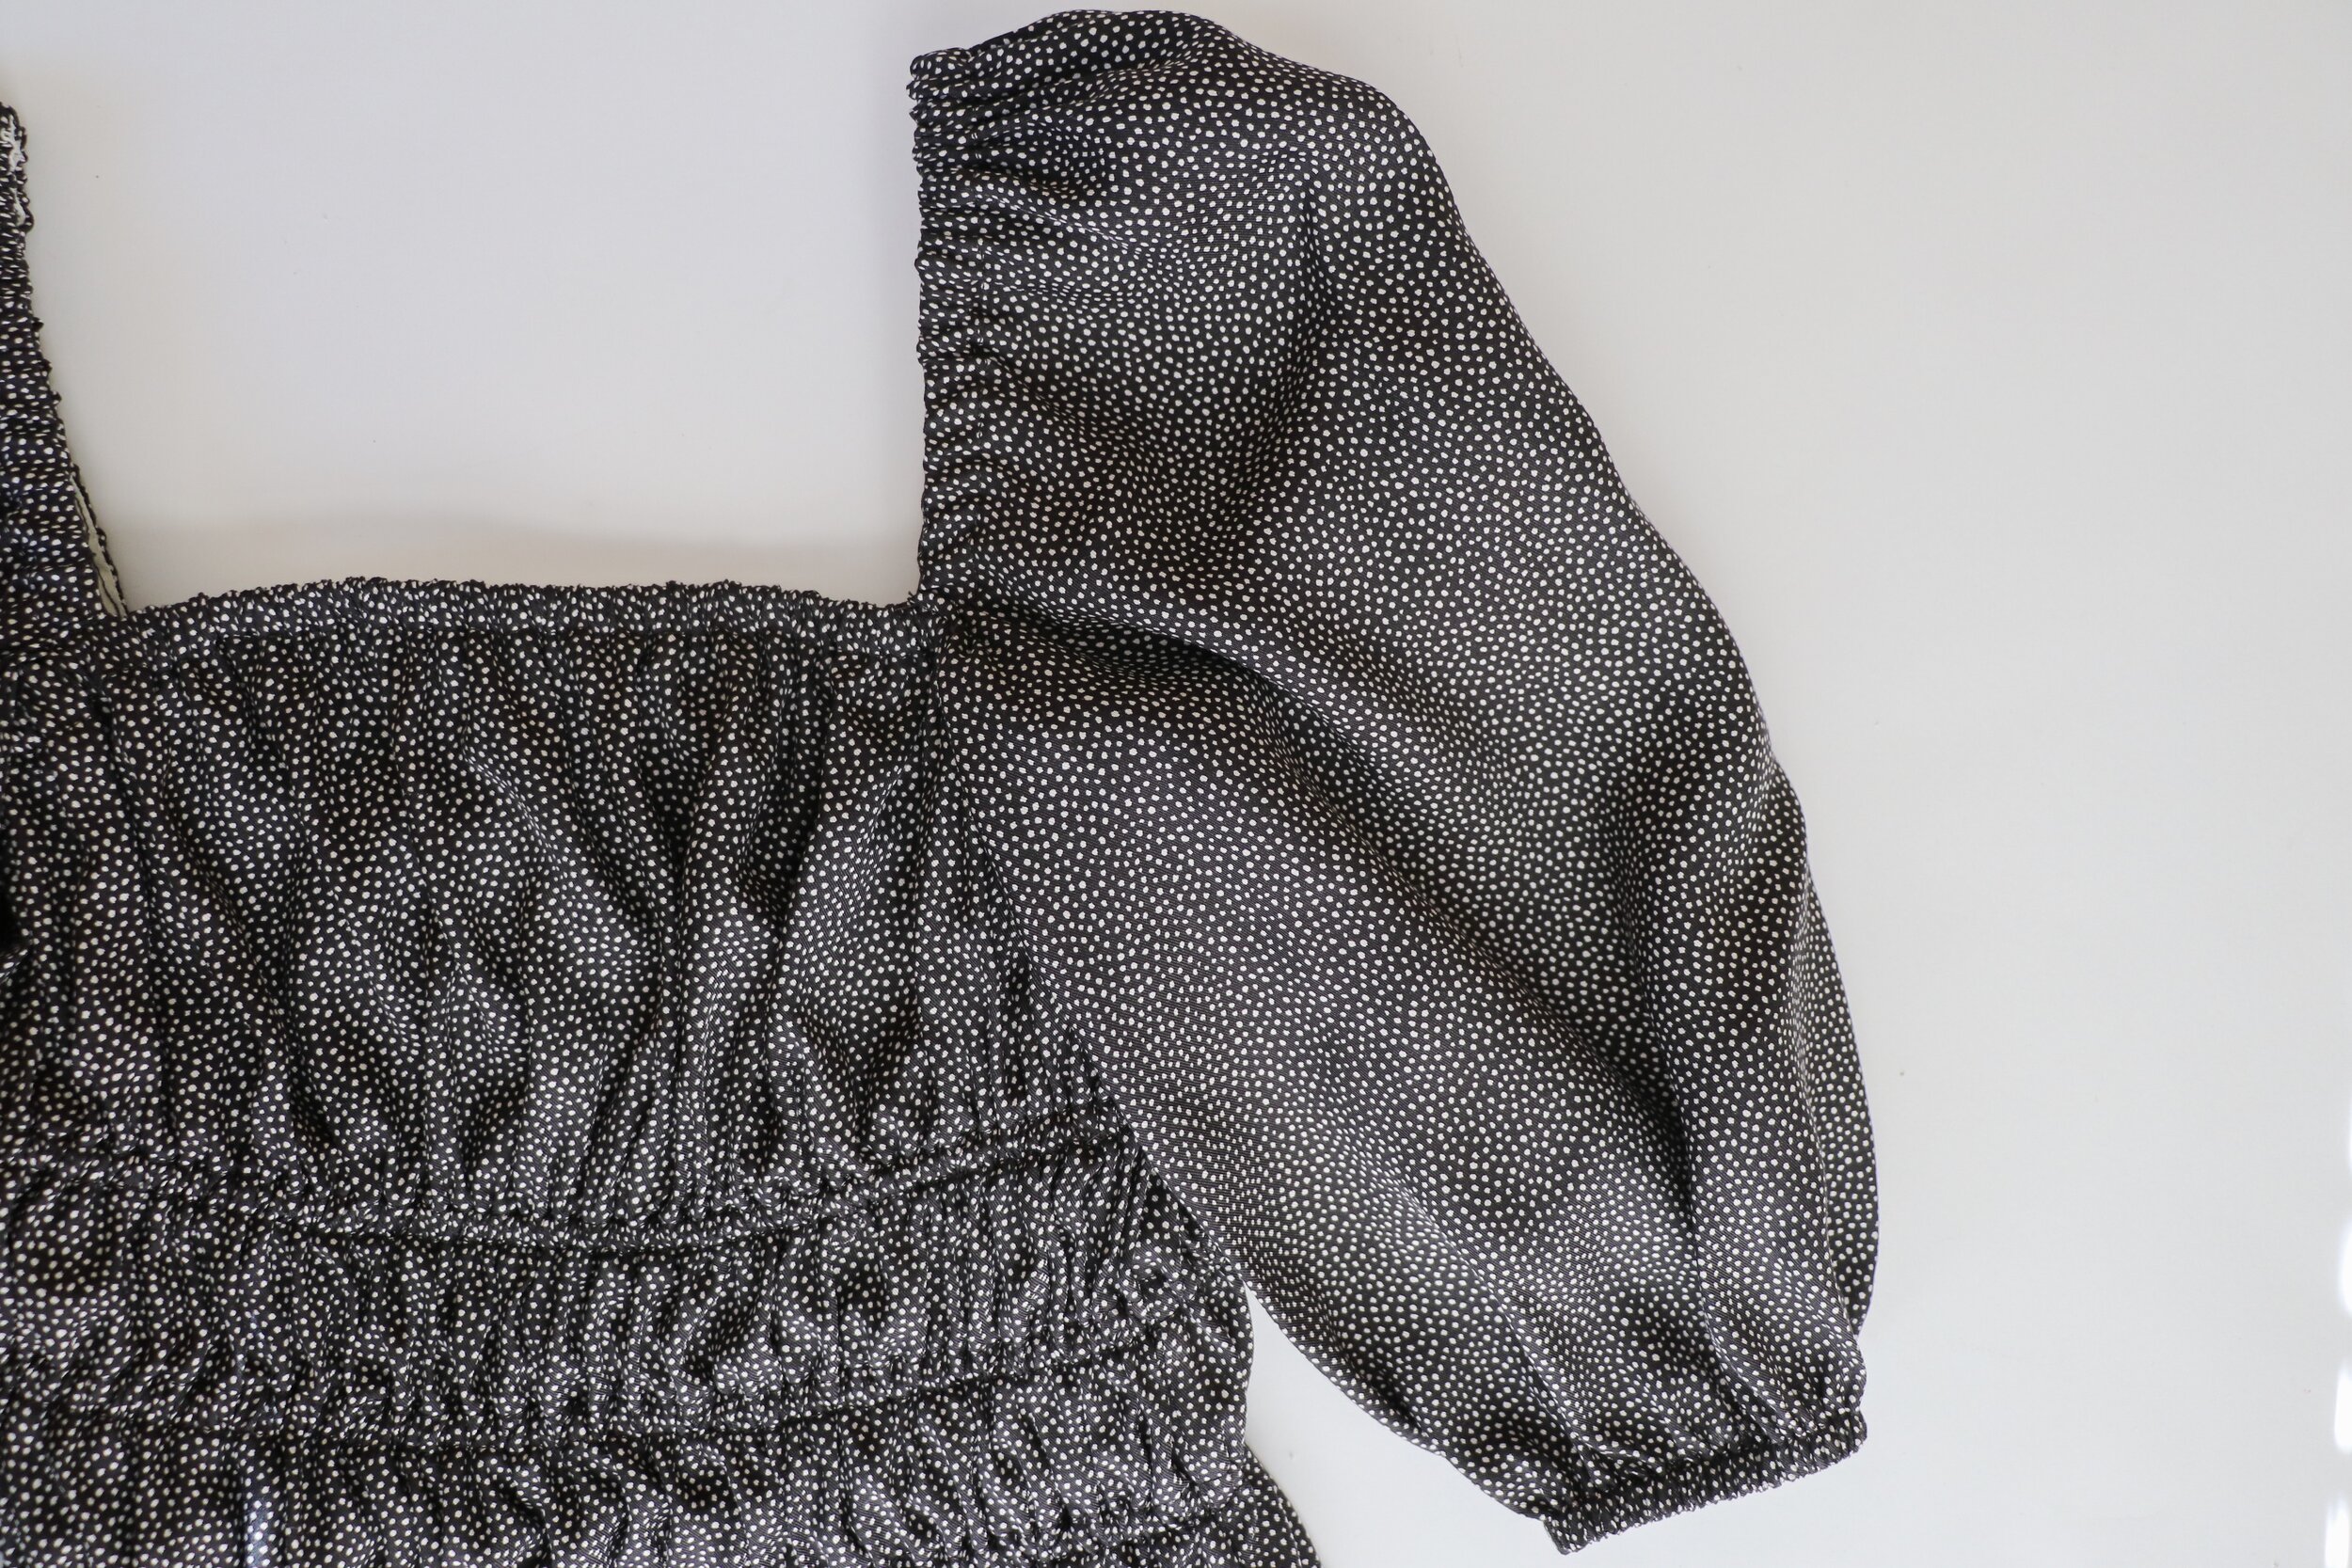
When I received this fabric from Measure Fabrics, I knew it had to made up into a special dress. It’s a twill, but a light weight and super soft twill. And a silk blend- so special! It drapes beautifully, but isn’t so lightweight that its sheer, I really didn’t need a lining at all. Seriously, I don’t know how else to describe the feel and drape of this fabric, it’s such a dream! One if those magic fabrics that could be made into almost anything - a special evening dress, a fun jumpsuit or floaty wide legs, a pretty blouse, etc. But my favorite part of the fabric? That itty bitty dot print. I love small details in fabric. And from far away this may look like a sold black or dark grey, but then you get up close and see those little polka dots, and UGH, so cute.

So like I said, I really wanted this to be an October witchy-feeling dress. I ended up going with a pattern that I have used once before. I made another version back in June, a sleeveless one. To be more fall appropriate, I sewed up the sleeved version this time around and OMG THAT SQUARE NECKLINE IS EVERYTHING. I want all my necklines to be this shape. It’s seriously so perfect. And it’s also a pretty easy pattern. It looks detailed and possibly complicated, but its not. The casing and elastic is a bit time consuming, but super simple and beginner friendly. Especially if you use store-bought bias tape like I did- hand made bias tape would take the difficulty (and yardage amount) up a notch), so be aware of that if you want to make one yourself! But I just feel like the combination of this fabric and silhouette couldn’t be a more perfect match.

I debated what to do with the leftover yardage for P’s outfit. I originally was thinking a dress for her too. But as the weather gets colder, there is no denying that she’ll get more wear out of pants. I actually have made her one of these jumpsuits before, too, so I knew it would be perfect for her. I love how the little ruffle detail along the top edge matches the little ruffle detail of the bottom half of my dress. What do you think? Is her a jumpsuit a good match to my dress, or would you have gone with a dress for her too?

handmade wardobe // checks and apples

my overalls: Marilla Walker Roberts Collection dungarees in gingham seersucker (plus lining) from Stonemountain and Daughter Fabrics

my top: Friday Pattern Company Adrienne Blouse in a cupro modal knit from Style Maker Fabrics

Penny’s: dress: Simplicity 1470 (made last year. pattern not available on website anymore)

Penny’s turban: self drafted

Penny’s Cardigan CottonOn

Both of our boots: Target

————————————————————————————

I tend to write about how much I love my newest makes. But honestly, they’re not all winners. Some don’t turn out the greatest. I’ve been imagining black and white gingham overalls for awhile now, and was pretty excited to finally get to them. But in the end, these ones aren’t love.

I think it first started with my fabric choice. Instead of purchasing a new gingham print, I decided to use this seersucker gingham that I already had in my stash. And its sheer. So I lined the whole thing. Ok, no problem. But probably not the best coice for this type of garment. Secondly, I think I just chose the wrong pattern, too. I was actually envisioning a more fitted pant, but the Roberts Collection dungarees are a looser, relaxed fit. Not an issue with the pattern, I think I’d like the look in another fabric, just not what I was picturing for this project. I slimmed it out in the legs a bit after the fact, but it really could’ve stood to be taken in at the waist, too, to really slim it out and make it more fitted. And because I waited until the end to take out some bulk in the legs, the inside of the garment is kind of a disaster. I know this isn’t visible from the outside, but it kind of drives me crazy. And lastly, seersucker isn’t the easiest to work with when working with prints with straight lines. Seersucker is textured and bubbly, and as much as I painstakingly and carefully cut everything out to keep lines straight, the bottom edge of the bib ended up being skewed. HOW?! I’m still not sure how this happened. And I didn’t have and spare fabric to re-cut it. So I was left with an uneven line at the waist seam, making my eye twitch every time I look at it. This is probably the worst of the problems for me, because it is the most obvious. I know any one looking at this isn’t going to know that this isn’t the shape I envisioned or that the insides are messy, but you can see that uneven waist seam from a mile away.

In the end, it’s wearable, sure. It looked pretty cute from afar at the apple orchard, and standing next to P in her matching check print. But it’s not love. And when it’s not love and has too many issues, it probabaly won’t survive my closet. I have a feeling it will eventually end up in the scrap bin to try and repurpose the fabric. C’est la vie. Maybe I’’ll attempt the same look again some other time, with a different pattern and fabric weight.

On a brighter note, I also made this buttery soft Adrienne Blouse at the same time and it definitly IS love. Love this pattern. Super easy and quick make, and fits like a glove. I’ll be making more of these!

I also made Penny’s dress….. last year. When I made it, I purposely added a very wide hem. It’s wide and has a loose fit, so I knew if I was able to just unpick the hem and lengthen it later on, we would get extended wear out of it. And that’s what I did! A year and half and still going strong with this dress. It actually has some sweet little ruffles that are hidden under the cardigan.

Handmade Wardrobe // Esme and Tully

cardigan: Named Clothing Esme cardigan (simplified hack) in a brushed sweater knit from StyleMaker Fabrics

pants: Style Arc Tully pants in a lightweight bleached denim from Stonemountain and Daughter Fabrics

tank top and shoes: Target

—————————————————————————————

I have two new handmade makes in this outfit, both of which I had very different experiences making!

First - these Tully pants. Remeber my obsession with the Spring Shorts over the summer, and how I made 5 different verisons of them. Yeah, these are the fall verison of that for me. They are peeeeeeerfect. And I’ll probably make another couple of pairs before fall is over. I had to make no alterations and the fit is perfect straight from the pattern. I really like it made up in this lightweight 6.5 oz bleached denim, but now I’m kind of curious what it would be like made up in a slightly heavier denim to more like a pair of fancy jeans.

And then there was this cardigan. Oh man, this cardigan. It took me three days to finish this thing up because it just was not going well. I wanted to make an Esme cardigan but cut short just below the pockets. Literally nothing went right in the process. And I realize now that It’s not anything to do with the pattern, but with my fabric selection. The pattern calls for a medium to heavier weight fabric with very little stretch, and I chose this very lightweight, very stretchy and drapey and droopy sweater knit. As a result, the pockets drooped, the placket was all twisted and funky, and the whole thing just drooped and was sad looking. I ended up cutting off the placket and cuffs, and just turned under the raw edge with a little knit hem tape for stability. I also stitched the pocket bags to the front of the cardigan, so that the stitching is visible from the front. This helps the pockets not droop quite so much. In the end, It doesn’t really look like an Esme, more like a much more simplified version of it. But for all the issues, I still think it turned out pretty good in the end!

handmade wardrobe // mommy and me leopard

my dress: True Bias Roscoe dress in a silky faille from Spoonflower (designer is Michelle Aitchison)

my boots: Target

Penny’s skirt: self drafted

——————————————————————————————————

Remember the leopard print from my last post? The sublt pink leopard print? This is the same one, just in bolder colors! It’s from the same designer, bought on Spoonflower (link is above). Except this one I got in the silky faille fabric. It’s a tad bit thicker than the crepe de chine I got the other colorway in. Its not at all sheer and really silky to the touch. I really like this one!

I’ve been on a True Bias patterns kick lately, between Ogden, Calvin, Hudson, and now Roscoe. My first Roscoe! And I’m in love. I went with the shorter dress/tunic length of the bodice, but used the longer/wider ruffle hem of the midi dress view for my perfect length.

I only had a strip of fabric left over in the end - not close enough to squeeze out a dress for P, too. So I went with my go-to, super quick and easy make for P to match me - an elastic waist gathered skirt. One rectangular piece of fabric, one seam, a quick casing, and some elastic. Voila - a skirt. I have a tutorial on Megan Nielsen Design Diary if you need help with this simple sewing project! I added some buttonholes and a black drawstring on this one too for just a bit extra.

handmade wardrobe // Sudley dress, and matching Cottesloes, too!

dress: Megan Nielsen Patterns Sudley dress in a burnout organza from Joann Fabrics (no longer available)

swimsuits: Megan Nielsen Patterns Cottesloe and Mini Cottesloe (tutorial for peplum and skirt) in a rust swim fabric from Blackbird Fabrics (no longer available)

————————————————————————

Its a two-in-one post! Or rather, three-in-one! Back in July, I made another set of matching Cottesloes for me and P to wear to a beach party. For these ones, with just one hack technique, I created two different looks - peplum bottoms for my two piece and a skirted one piece for Penny! You can find the tutorial for how to do this over at Megan Nielsen Design Diary.

I also made a really fancy beach cover up using this sheer/burnout organza, and you guys, I’m in loooooooove. Exactly what I was imagining. And that little keyhole detail in the back of the Sudley (can be worn in the front, too!) is just too cute. Because It’s sheer, I had to take extra special care to make the inside pretty as well. Since you can see it! So I finished all seams with either french seams or bias bound edges. I have a really pretty mustard yellow silky fabric that I want to make a slip dress out of to wear underneath, so I can wear it off the beach, as well!